Numbers Don’t Lie When It Comes To Marketing

As an eCommerce marketer you occasionally may find it a challenge keeping your focus where there is the highest opportunity for potential growth.

With all the various ways that customers can find your products – email, pay-per-click, organic and direct it can be difficult to know which marketing channel to focus your efforts.

More and more, it has become essentials for retailers to focus on driving potential customers to their website using paid traffic.

Options for paid traffic include Google Ads (shopping and search), Bing/Microsoft Ads, Pinterest, Facebook Ads, eBay, Walmart and Amazon just to name a few. And these are only just some of the available marketing channels!

Today, most retailers find it is necessary to use paid ads to drive traffic to their website if they want to scale sales and substantially grow as a business.

Afterall, nothing is more frustrating than having great products, but your ‘right’ customers don’t even know that you exist.

Regardless of how much demand there is for your products or how much your customers will love your products, without knowing you exists it will not matter.

The scenario of not effectively advertising typically means little to no sales or even worse, sales, but little to no profitability.

Given we know that we need to advertise where should we focus our online marketing efforts?

An undisputed truth when it comes to marketing is that numbers never lie.

Therefore, as marketers it is our job to track the numbers and specifically the right numbers in order to measure and improve the effectiveness of our marketing.

Here are the most common KPI’s (key performance indicators) and the different measurements that I use to guide successful marketing for my private clients. In addition, I’m going to show how I compile this information and use it to make strategic decisions.

I’m using these KPI’s in terms of Google Ads, but you can use these same key performance indicators to evaluate any of your paid marketing channels.

Account Health – KPI’s – Key Performance Indicators

‘Account Health KPI’s’ are used to monitor the health of your advertising channel. They give you a 30,000-foot view to measure your advertising efforts.

These KPI’s should be reviewed on a timeframe that allows enough data to become statistically relevant.

For my private clients, the following Key Performance Indicators are what I use to track on a monthly basis as indicators of the overall health of their accounts.

ROAS – Return on Advertising Spend

An easy formula to calculate, ROAS is calculated simply by dividing dollars generated by dollars spent.

Example, if you spend $1,000 advertising and generate $6,500 in sales, then your ROAS is 6.5. (6,500 / 1,000 = 6.5).

A ROAS below 1 means that you are spending more on ads then generating revenue (of course not good). The higher the ROAS the healthier and typically more profitable is your advertising campaign.

Not only do I track ROAS for the account, but I will use this indicator as a benchmark for individual advertising campaigns.

Note, that ROAS does not account for cost of goods, however, it is a simple calculation that can quickly measure the success of your advertising efforts and that is why I prefer this indicator.

Just like the amateur golfer, you are using this number to compete against yourself striving for better numbers and using ROAS to compare past results.

Rolling CAV – Customer Annual Value

Rolling CAV is calculated by calculating the total sales generated over the last 12 months and dividing by the number of total customers over the last 12 months.

Example, last 12 months your generated $150,000 online and had a total of 1,200 customers, then your CAV is 125. (150,000 / 1,200 = $125)

Note, it is important to use the number of customers and not the number of orders. Using the number of orders will give you the average order value, but not the customer annual value.

This KPI is important because it measures the importance of gaining a new customer. Many times, customers where it initially costs to attain them through paid advertising become exceedingly more valuable as return customers. By keeping track of the CAV, advertisers can determine just how valuable on average each customer is to their business.

True ROAS – True Return on Advertising Spend

This is a combination of your ROAS and your Rolling CAV. I calculate True ROAS to show the annual health of paid advertising and the dollars that I expect marketing to generate over a year.

Why is this metric important?

Unless you are selling one-off goods, typically you will have repeat buyers.

Once a customer purchases your product initiated through paid ads, then the customer is yours. You are free to market to them as you see fit whether that be through email, direct mail or any other variety of touch points.

In addition, generating a new sale from a past customer typically is going to be less expensive than generating that initial purchase and that is reason this metric is important.

Example, last month you spent $1,000 and generated $6,500 in sales for a ROAS of 6.5. This $6,500 was generated by orders from a total of 80 customers.

Over the course of the year, we can expect those 80 customers each to generate an average of $125 in sales based on our current rolling CAV.

Therefore, our True ROAS would be calculated by (80 * 125) / 1000 = 10

This calculation does two things.

First, it demonstrates the importance of gaining new customers by calculating their expected value through the next 12 months and not solely based on the initial sale.

Second, and maybe more importantly, it demonstrates the importance of concentrating on repeat business from your current and past customer base. Increase the CAV from $125 to $200 (just a sale more per customer on average per year) and guess what happens to your true ROAS.

(80 * 200) / 1000 = 16

It goes from 10 to 16!

Optimizing Indicators – KPI’s – Key Performance Indicators

Account Health KPIs are terrific for measuring longer term success. However, measuring success on a monthly basis alone is going to have you more reactive in your account changes instead of proactive.

Fortunately, there are five main optimizing indicators that can give us quick insights into the health of the account on a much more granular level.

When I look at a Google Account for a shorter time frame, such as weekly or even daily, these are the Optimizing Indicators that I review for any sudden spikes or declines.

Conversions – Number of total sales.

Conversion Value – Total dollars generated from your sales.

Cost – Dollars spent to generate all sales.

Avg CPC – Total ad spent divided by total clicks.

CTR – Total clicks divided by total impressions.

These Optimizing Indicators are all readily available within the Google Ads Console.

In order to remove or add or even rearrange columns, advertisers can use the column button.

An important realization is that knowing your KPIs are not enough to make successful changes. You must take decisive actions to successfully optimize your paid advertising once KPIs are calculated.

What action?

That is really going to be the million-dollar question or in the case of some eCommerce businesses the multi-million-dollar question.

Throughout my books as well as my podcast I offer different techniques and strategies to optimize on changes both positive and negative to your KPIs and hence to your marketing.

Final Word

What gets measured, get improved. A cliché for certain, but truth none the less.

If you don’t stay on top of your numbers, then your numbers will stay on top of you. I think that I just made that up, but it sounds a bit profound for me so who knows :>

What this article has given you are the key calculations you should be crunching on a monthly basis as well as the KPIs to review on a weekly/daily basis.

Knowing your numbers alone will not help you get better results. Once you have identified a positive or negative trend using Account Health Indicators or you identify a sudden spike or sudden decrease in your Optimizing Indicators it is important to take quick and decisive actions to either halt the negative or capitalize on the momentum.

These actions come in the form of increasing or decreasing bids, adding negative keywords, adjusting bids based on device and a host of other strategies to optimize your paid advertising results.

However, one thing cannot be denied, which is if you don’t keep track of your KPI’s, then you will never know that any action is needed along with the other undeniable fact, which is numbers never lie!

Happy Marketing!
Andy Splichal

ABOUT THE AUTHOR

Andy Splichal is the founder and managing partner of True Online Presence, author of the Make Each Click Count book series, host of the Make Each Click Count podcast, founder of Make Each Click Count University and certified online marketing strategist with twenty plus years of experience helping companies increase their online presence and profitable revenues. In 2020, he was named to Best of Los Angeles Awards’ Most Fascinating 100 List. To find more information on Andy Splichal, visit www.trueonlinepresence.com or read The Full Story on his website or his blog, blog.trueonlinepresence.com.

My New Book – Make Each Click Count Using Google Shopping – Just Released

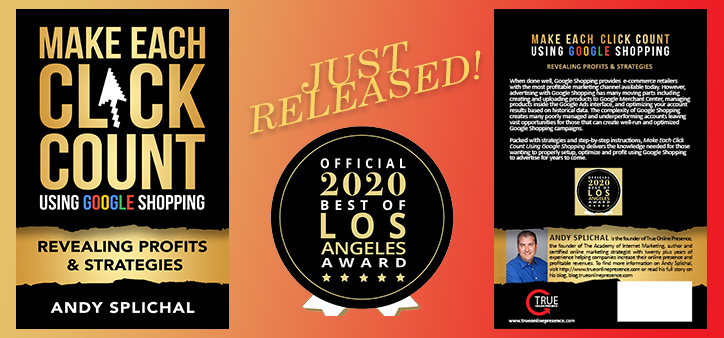
Last week, my new and second book Make Each Click Count Using Google Shopping – Revealing Profits & Strategies was released on Amazon!

One question that I was immediately asked was “do you think it is wise to release your book in the midst of a worldwide pandemic?”.

My answer was a resounding YES and there is more than one reason why that is the case.

First and foremost, especially for e-commerce companies selling products online, due to the recent shifts in overall buying habits it has never been more important for companies to optimize their online marketing.

Overall, online sales have increased in a steady upward trajectory over the last 15 years. Recently, in 2019, e-commerce sales increased to 16% of all sales an increase from 14.4% in 2018 and 13.2% in 2017 according to Internet Retailer.

Although nice steady increases, many experts predict that the COVID-19 pandemic will change the way shopping is done and specifically accelerate the percentage of shopping that will forever be done online.

In 2020, online shopping could increase to as much as 50% of all sales. As new shoppers become more accustomed to shopping online and become more adept at doing so, the percentage of online sales could increase even higher than 50% over the next few years.

If you are selling products online, you should be filled with optimism. If you are not selling products online, you should be thinking about how and where you can start.

Either way, this book provides a ton of fundamentals and strategies to help business owners become profitable selling products using Google Shopping, the largest comparison-shopping website online.

Second, as companies prepare to either resume or expand their online marketing, it is essential for business owners to know exactly how their online advertising dollars are spent.

Before our current crisis and perhaps even now many ecommerce store owners simply would hire out their outline marketing to a Search Engine Marketing (SEM) agency.

Outsourcing paid marketing is common practice as many store owners either do not have the knowledge, the time or both to setup, manage and optimize their online marketing. This is especially true with Google Shopping with all its moving pieces including creating a Merchant Center account and optimizing bids in the Google Ads interface.

However, blindly trusting a company to have your best interest in mind could be a serious mistake and may not be a wise spend of your advertising dollars.

My new book, Make Each Click Count Using Google Shopping, has been written in an easy to understand format with stories, screenshots and directions that will make it easy to understand how well your current Google Shopping campaigns are being managed even if you decide to outsource.

For those business owners, who decide to outsource their Google Shopping, it would be wise to read through this book to ensure their current advertising is producing to the best of its ability.

For business owners that are running their own Google Shopping campaigns, this book brings methods learned and strategies developed over two decades managing hundreds of thousands of dollars that can be quickly implemented into your campaigns.

Especially, in our current climate, being prudent with advertising spend is essential. This book will help business owners do just that whether outsourcing or running Google Shopping inhouse.

Am I Doing Anything For My Book Launch?

I learned a lesson from my first book 5 years ago that you need to do more than just publish a book and expect a ton of distribution.

In fact, did you know that the average book published on Amazon only sells a lifetime total of 250 copies?

This book is such a valuable resource to anyone who is selling products online that it absolutely needs to get it into as many hands as possible!

Therefore, I have substantially reduced the price of the kindle version to $1.99. Now through June 4th, buyers can purchase the kindle version at Amazon at an 89% discount.

Click Here to Purchase on Amazon

And although it makes me a little sick to the stomach offering what has been my main focus over the last 12 months of writing this book for $1.99, I must remember my ultimate goal.

My desire is to get this book into as many hands as possible who will be able to benefit and increase their profitability using Google Shopping from reading this book.

After June 4th, customers will continue to be able to purchase the book on Amazon for the standard price or they can purchase direct at www.makeeachclickcount.com where they will find a few more special offers not available on Amazon.

What Are Others Saying About The Book?

I am extremely proud of this book and feedback is proving to show that this book may be my best so far!

This book just received ‘The Official 2020 Best of Los Angeles Award’ for its content and we were greatly honored.

In addition, the reviews on Amazon have been extremely positive (see below).

For a writer, one of the most important aspects is the feedback. It helps you grow in so many ways, not only as a writer and teacher, but as a person.

I encourage all who order this book to read a few chapters and write an honest review of what they were able to take as far as strategies and lessons on improving Google Shopping.

You can read all reviews, by clicking here.

If you are looking to improve your results using Google Shopping, I encourage you to read this book and to place your order before June 4th to take advantage of the currently discounted price.

Also, if you have any questions, I also encourage you to reach out directly through this blog or email us at [email protected].

Looking for More Information on Google Advertising?

Check out the all new The Academy of Internet Marketing (www.theacademyofinternetmarketing.com), the premier online marketing destination for small to mid-sized e-commerce businesses serious about substantially growing their online sales plus exclusive access to me, author of Make Each Click Count book series.

Complete Access To The Academy of Internet Marketing For $1

If you have the dedication and are ready to take your online sales to the next level, then The Academy of Internet Marketing was created for you. It provides the tools in the form of knowledge of what works today. Join us and see what makes us special and together we will grow your business.

If you are ready to take your online advertising to the next level, I welcome you to take a trial. It only costs $1 for access.

Happy Marketing!
Andy Splichal

ABOUT THE AUTHOR

Andy Splichal is the founder of True Online Presence, author of the Make Each Click Count book series, founder of The Academy of Internet Marketing and certified online marketing strategist with twenty plus years of experience helping companies increase their online presence and profitable revenues. To find more information on Andy Splichal, visit www.trueonlinepresence.com or read The Full Story on his blog, blog.trueonlinepresence.com.

Populating Merchant Center with Proper Data

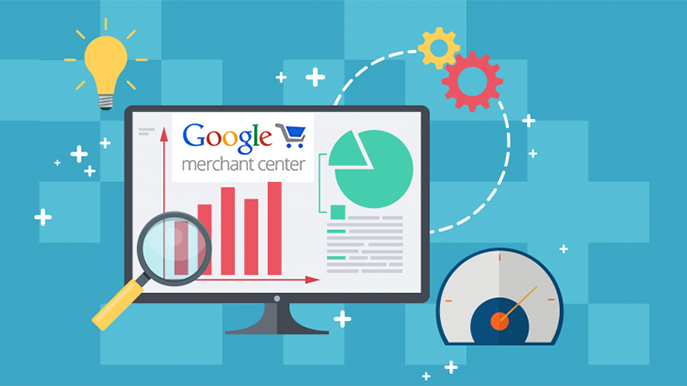
After your Merchant Center has been approved and you have completed the appropriate settings for shipping, tax, etc. it is a critical time. A time that will play a major part in determining your success using Google Shopping. It is time to create your plan for populating your product data inside Merchant Center.

You will soon discover that having well formatted data is going to be essential in order to properly segment campaigns inside the Google Ads interface.

Updating Product Data in Merchant Center

To get started you need to submit the products to Merchant Center that you want to have eligible to appear in Google Shopping. When submitting your products, there are four options:

Google Sheets – You make all of the changes manually to the product data using a Google Sheet. These changes are automatically applied to your account once uploaded.

Schedule fetch – You host a data feed file on your website and schedule a time for Google to fetch updates from the file. Once the fetch occurs, Google applies updates to your products in Merchant Center.

Upload – This is the most common. With this method you keep the file and schedule a regular upload into your merchant center using SFTP, FTP, Google Cloud storage or a manual upload.

Content API – The Content API for Shopping enables merchants to automatically upload product listings using an API connection.

The Process of Submit Products

Unless you have just a handful of products that rarely change in terms of inventory and pricing it typically is not viable to manually create and update a product feed.

The good news is that there are many 3rd party Data Optimization Companies that specialize in getting data from your website to Merchant Center. The bad news is how do you know which data optimization company is a good fit for your company and for your needs.

The better a data optimization company is the easier they are going to make the process for merchants of taking data in their website and easily customizing that data into Google’s different fields.

Here are currently the different fields that are supported in Google Shopping. Not all the fields below are required, but the more fields that you populate the better Google is going to be able to match your products to relevant customer searches.

Being able to populate all or at least as many of these fields as possible is why using a 3rd party data optimization company is usually an essential addition to your Google Shopping efforts.

Image if you have 5,000 products and after spending hours creating your initial upload you need to make changes to just a couple of these fields. It would take a long time, right?

Changes can be done using a data feed optimization company in a matter for seconds or minutes instead of hours.

Most fields are not required. Only 13 fields are currently required to have products approved in Merchant Center for non-apparel items and 20 fields are required for apparel items.

Note, some of the required apparel fields are only required in Shopping Actions not to be approved in Google Shopping. For information on Shopping Actions see my article – Google’s Shopping Actions – Changing The Landscape.

Choosing a Data Feed Optimization Company

Now that you have discovered why it is a good idea to partner with a data optimization feed company, how do you select which company is right for your business?

Typically, the price of this service can range from twenty dollars to hundreds of dollars per month so choosing the right company is going to depend on a few things:

  1. Are you planning on using the data feed company to send your product feed to other comparison-shopping engines other than Google Shopping? Since Google Shopping is the largest comparison-shopping engine, typically all companies are going to have this feed well structured. The difference with the more expensive companies usually will be in how well they can structure the feeds going to other Shopping portals.
  2. How does their system allow you to manipulate your data feed? The main purpose of using a data optimization company is to be able to easily populate your data feed. No matter what company you select there will be a learning curve; however, make sure you get a full overview as learning how to manipulate and submit your feed is essential.
  3. Make sure you know how the company charges. Some data optimization feed companies charge additional based on how many products you have. Once you reach a certain number of products the monthly charge may start increasing.
  4. Support is key. There is going to be a learning curve. Make sure whatever data optimization company you select offers full support in helping you get started as well helping with questions maintaining the health of your data feed moving forward.
  5. Make sure you can easily review your feed. As time passes, you are going to want to be able to export your feed. With some data optimization companies that use an API, I have found that this is not possible.
  6. Don’t sign a long-term contract! There are so many data optimization companies out there that don’t require a long-term commitment. There is no reason to be locked into anything other than a month-to-month agreement.

Working with Your Data

Once you have selected a data optimization company, the first step is importing your products into their system. It is within the data optimization company’s system, that merchants will format their feed and manipulate the data populating as many of the fields above as possible.

Remember, the more fields you populate the more effective Google will be in matching your products to related customer inquiries.

Also, start thinking about how it makes sense to segment your products. Google provides the custom label fields in order to help their advertisers segment their data.

The custom label fields serve no other purpose in your data feed other than to organize your products, so feel free to enter whatever data you want that will better help you segment your campaigns.

For more information on custom labels including ideas on how to effectively use, check out my article – Segmenting Product Data – Develop Your Plan With Custom Labels.

Submitting Your Feed

Assuming that by now you have already claimed and verified your Merchant Center and have completed your tax and shipping settings the last piece of completing your merchant center is submit your first product feed.

To begin submitting your first data feed you will need to navigate under Products in the left-hand menu to ‘Feeds’ and then click on the blue plus button under Primary feeds.

Next, you will select your country of sale, the language for the content of your feed and the destination in Google that you wish your products eligible to appear. As a default Shopping ads are checked, for information on how to have your products eligible to appear in Shopping Actions see my article – Google’s Shopping Actions – Changing The Landscape.

Then, you will name your Primary feed and select the input method. The input method is going to depend upon your data optimization company, but most likely will be the Upload option.

If you select the upload option, you will enter the name and type of file exactly as it will appear coming from your data optimization company. In order to be successfully processed, this must be exact.

In addition, you can upload your new file manually on this page to test if it will be accepted.

Now that your feed is created there are a couple more items that you will need to format before your feed will be successfully submitted.

First, you will need to provide your data feed optimization company the ability to connect with your Merchant Center account. To do this you will need to provide them with your Merchant Center SFTP or FTP login credentials. To find these credentials, click on the wrench icon in the top tool bar and choose ‘SFTP/FTP/GCS’ under ‘Settings’.

Depending on how your partnered data optimization company connects, this is where you will be able to find the needed credentials.

The last thing that generally causes an initial feed to fail is the merchant not selecting their ‘Default currency’. This is the type of currency used to sell products included in the feed.

In order to select, click on your feed name and click on settings. Under ‘Default currency’ you select your correct currency and save.

That’s it. Your feed should now be successful submitted into Google Merchant Center. Google can take up to 72 hours to first process and approve your items, so you will need to be patient. Soon you will be ready for the really fun stuff – setting up your campaigns inside the Google Ads interface!

Final Word

Creating your Merchant Account and formatting your corresponding data feed is going to take some work. However, given that products advertised in Google Shopping are producing some of the highest returns on investment it is most likely worth the work.

As competition grows for advertisers using Google Shopping, it is going to take more than just sending a partially developed data feed and bidding the same for each item in Google Ads in order to be successful.

However, by fully developing your plan with your data feed you will gain an immediate advantage over your competitors.

For those of you with a large number of product offerings or product offerings that change frequently it will be essential to partner with a solid data optimization company. Use the list above in this article to determine the right fit and don’t delay. Customers are out there actively searching for your products and you want to make sure they can find you!

Related articles –

There Can Be No Google Shopping Without A Google Merchant Account
Segmenting Product Data – Develop Your Plan With Custom Labels
Using Supplemental Feeds in Merchant Center
How Segmenting Google Shopping Campaigns Can Boost Profitability

Looking for More Information on Google Advertising?

Check out the all new The Academy of Internet Marketing (www.theacademyofinternetmarketing.com), the premier online marketing destination for small to mid-sized e-commerce businesses serious about substantially growing their online sales plus exclusive access to me, author of Make Each Click Count, The TOP Guide To Success Using Google AdWords.

Complete Access To The Academy of Internet Marketing For $1

If you have the dedication and are ready to take your online sales to the next level, then The Academy of Internet Marketing was created for you. It provides the tools in the form of knowledge of what works today. Join us and see what makes us special and together we will grow your business.

If you are ready to take your online advertising to the next level, I welcome you to take a trial. It only costs $1 for access.

Happy Marketing!
Andy Splichal

ABOUT THE AUTHOR

Andy Splichal is the founder of True Online Presence, the founder of The Academy of Internet Marketing, author and certified online marketing strategist with twenty plus years of experience helping companies increase their online presence and profitable revenues. To find more information on Andy Splichal, visit www.trueonlinepresence.com or read The Full Story on his blog, blog.trueonlinepresence.com.

Segmenting Product Data – Develop Your Plan With Custom Labels

Pretend that you are a new advertiser and have decided to start advertising using Google Shopping. You have successfully uploaded your products into Google Merchant Center and you have completed your basic settings. Google has approved all of your products and you have linked your Merchant Center account to your Google Ads account.

So, you are done, right?

The fact is that although you may be now able to advertise using Google Shopping ads you are far from done if you wish to run successful Google Shopping campaigns.

Many accounts I have reviewed over the years unfortunately stop after the initial setup is complete leaving a merchant’s entire line of products to linger in a single Google Shopping campaign. Running a single Google Shopping Campaign is difficult to optimize and almost impossible to use in order to be able to generate profitable sales.

This article is written for advertisers wishing to squeeze all possible sales and profits out of Google Shopping advertising and discusses why failing to segment their product feed is such a costly mistake.

Why Should You Segment

When advertising Shopping ads inside of AdWords, similar to Search ads, advertisers will typically see the best results by segmenting their products into smaller groups of similar products using different Shopping campaigns.

The reason to segment your products is that segmenting allows you to more easily optimize your bidding and control your keywords based on past results. Although these are more advanced concepts, for now we just need to know that we want to be able to segment our data feed.

For those wanting to skip ahead in the process to discover the cool stuff like how we are going to optimize bidding and control keywords, you can read these past articles:

Positive Keywords – A Better Way to Control Unwanted Searches

Effectively Optimize Google Shopping Based on Your Past History, Nothing More

However, before we can delve into advanced strategies, we need to first set the basics with the best ways to segment your data inside of your Merchant Center feed. Once we have successfully segmented our data, we will have everything we need to fully optimize our advertising inside of the Google Ads interface.

Segmenting – Having A Plan

Let’s first again quickly review how Google Shopping works:

It Starts With A ‘User Query’
– Google matches –
eligible products in Google Shopping campaigns using
Keywords – Taken from the title and description
then they use a
Real time auction

This formula determines the ad rank or order in which products appear within Google Shopping.

First and foremost, your products need to be eligible to appear. This means having some minimum required data within your data feed including item name, price, image, product id, URL, brand, condition, shipping, tax, gtin or mpn and description.

These are the current basic fields Google requires for non-apparel items. For apparel items, there are even more additional fields including color, gender and age group that are needed.

In addition, to all these required fields, Google has another 40 or so fields they use in order to help match products in user queries along with allowing users to filter data in the Google Shopping tab. The more data you submit inside your feed the more likely your products will appear for relevant searches and will increase when they also appear if users are filtering products within Google Shopping.

Populating data into required fields and into suggested fields is a great start; however, our goal as advertisers is not to be able to just advertise it is to be able to advertise and make a profit.

Inside of a product ad group within a Shopping campaign inside the Google Ads interface, advertisers are allowed to subdivide their products by the following fields – Category, Brand, Item ID, Condition, Product Type, Channel, Channel exclusivity or Custom Label 0, Custom Label 1, Custom Label 2, Custom Label 3 or Custom Label 4.

While most data fields are used by Google to match relevant products with users’ queries the only purpose of custom labels is to allow advertisers to add the data, they wish to use in order to be able to subdivide their feed inside of Google Ads.

For step by step instructions on how to subdivide product ads, you can read my article How Segmenting Google Shopping Campaigns Can Boost Profitability.

For now, we need to have plan for deciding what data our custom labels should contain where it will make sense for us to segment.

For my private clients, I typically use custom label 0 and 1 to further identify the item either by name or item type.

For custom label 2 I use as a pricing tier – $0-10; $10-$25; $25-50, etc. This will allow me to implement a tiered bidding strategy.

Finally, for custom labels 3 and 4 I typically use to identify either new items or best-sellers.

Here is a look at mapped data file for one of my private clients. Pay attention to the custom labels.

Remember the purpose of adding custom labels are so you can easily segment in order to adjust bids based on sales or spend.

Although your custom labels may vary, this template should serve you as a pretty good roadmap.

Final Word

Being able to control the data in your Google Merchant Center feed is essential to the success of your Google Shopping campaigns. And although implementing advanced strategies such as Positive Keywords, The Adding of Negative Keywords and other optimizations based historical data is much more glamourous and can even be quite fun; first you need to have your data feed properly optimized.

Given this fact it is important that get under the hood so to speak and before you start advertising you first fully understand how Google Shopping ads work.

Second, you must have complete control on your data feed.

Don’t worry there are many great data optimization companies that can help format your data feed and that provide the tools to easily map the feed from data within your website.

However, the strategy of what data to use to populate the custom labels is going to determine how you advertise using Google Shopping and that is something where the strategy should come from you!

Like any strategy, it shouldn’t happen on the fly. Instead it should be measured and calculated in order to provide the most optimal results. This of how it makes sense to segment your data and then add the custom labels to make segmenting possible.

Looking for More Information on Google Advertising?

Check out the all new The Academy of Internet Marketing (www.theacademyofinternetmarketing.com), the premier online marketing destination for small to mid-sized e-commerce businesses serious about substantially growing their online sales plus exclusive access to me, author of Make Each Click Count, The TOP Guide To Success Using Google AdWords.

Complete Access To The Academy of Internet Marketing For $1

If you have the dedication and are ready to take your online sales to the next level, then The Academy of Internet Marketing was created for you. It provides the tools in the form of knowledge of what works today. Join us and see what makes us special and together we will grow your business.

If you are ready to take your online advertising to the next level, I welcome you to take a trial. It only costs $1 for access.

Happy Marketing!
Andy Splichal

ABOUT THE AUTHOR:

Andy Splichal is the founder of True Online Presence, the founder of The Academy of Internet Marketing, author and certified online marketing strategist with more than a decade and a half of experience helping companies increase their online presence and profitable revenues. To find more information on Andy Splichal, visit www.trueonlinepresence.com or read The Full Story on his blog, blog.trueonlinepresence.com

Measuring Conversions – Implementing Proper Tracking

Last week, I conducted a welcome call with a customer taking a trial to The Academy of Internet Marketing when she asked the question, “how can she tell where her conversions are coming from?”

Although it may seem basic to those online marketers with experience, for advertisers just starting out, being able to determine how conversions are generated is a vital question that needs to be addressed.  After all, what gets measured gets improved and if you can’t measure it, well then how can you improve it?

Options for Tracking Conversions    

To track sales or other events, advertisers first must add a small bit of tracking code to their website often referred to as snippet. This snippet of unique JavaScript code is automatically created by each marketing channel and allows the advertiser to track users arriving to a website along with actions that a user takes and then integrate the action into their reporting. This process of adding code works the same way (of course with a different code) whether it is Google, Bing, Facebook or an array of other paid and organic marketing channels.

For sales coming from AdWords there are several ways to track conversions along with several options for what type of conversions to track. With the use of an AdWords code snippet, advertisers are able track sales and other actions on their website; track app install and other actions on their apps; track calls from your ads or your website or advertisers can import conversions from other systems including Google Analytics.

In addition, advertisers also have the option of tracking conversions through Google Analytics by adding a global site tag or through use of Google’s tag manager.

Tracking Conversions Using Google AdWords

The most common conversion to track for e-commerce stores is the purchase of an item. In order to start tracking conversions, there are two main pieces.

First, create the conversion action.

Second, add the conversion tracking tag to your website.

Creating The Conversion Action

  1. Login to your Google AdWords Account. 
  2. In the upper right corner, click the tools icon, and under “Measurement,” select Conversions.
  3. Select the plus button.
  4. Select Website.
  5. Next you need to select the action you wish to track. If you want to track conversions, you will select Purchase.
  6. Then, you will want to enter the conversion name. I recommend giving it a recognizable name such as ‘website sale’ or ‘website purchase’.
  7. You will then be asked to select the “Value” of the conversion.  Here you have 3 options:
    • Use the same value for each conversion. Enter the amount each conversion is worth to your business.
    • Use different values for each conversion. Use this option if, for example, you’re tracking purchases of products with different prices. Later, when you add your conversion tracking tag, you’ll need to customize your tag to work to track specific values.
    • Don’t use a value
  8. The next option is how you want to count conversions. Here you have two more options:
    • One. This setting is recommended for leads, such as a sign-up form on your website, when only one conversion per ad click likely adds value for your business (such as an opt-in or lead).
    • Every. This setting is recommended for sales, when every conversion likely adds value for your business.
  9. Then you need to select conversion window.  This determines how long the system will track conversions after an ad interaction from the drop-down.The window can be 1 to 90 days. Industry norm is 30 days.
  10. Click View-through conversion window. Select how long to track view-through conversions from the drop-down. The window can be 1 to 30 days. The default on this option is 1 day. This is going to be used for remarketing. I typically leave this setting at 1 day.
  11. Then, you need to select whether you want to include this as a conversion in your reporting. Typically, this option is set to Yes unless you are setting up a conversion that you don’t want to count in your reporting, which would generally NOT be the case for tracking an online purchase.
  12. Finally, you will need to select the attribution model.
  • Last click: Gives all credit for the conversion to the last-clicked ad and corresponding keyword. When using the last click model, you might notice a slight time lag between what’s reported in the “Conversions (current model)” column and the “Conversions” column for recent time periods. This lag eventually corrects itself.
  • First click: Gives all credit for the conversion to the first-clicked ad and corresponding keyword.
  • Linear: Distributes the credit for the conversion equally across all clicks on the path.
  • Time decay: Gives more credit to clicks that happened closer in time to the conversion. Credit is distributed using a 7-day half-life. In other words, a click 8 days before a conversion gets half as much credit as a click 1 day before a conversion.
  • Position-based: Gives 40% of credit to both the first- and last-clicked ads and corresponding keyword, with the remaining 20% spread out across the other clicks on the path.
  • Data-driven: Distributes credit for the conversion based on past data for this conversion action. (This is only available to accounts with enough data.

Note, over the last year, I have been transitioning my private clients to the Position-based attribution option as it seems to provide the clearest picture of how a sale occurs.

13. Click Create and continue.

You’ll now see a screen that shows you’ve created your conversion action. Follow the instructions in the next section to set up your tag.

Adding Conversion Tracking Tags

Once you have your conversion goal configured you need to add two bits of code to your website for Google AdWords to be able to track when a conversion occurs.

The first piece of code (the global site tag) needs to be placed on every page of your website, within the header of your website between the <head> and the </head> tags. The global site tag works to add visitors to your “all visitors” remarketing list, if configured, and will set a new cookie on your domain that will store information about the ad click that brought a visitor to your website.

The event snippet code needs to be placed on the page that counts as your conversion, typically the thank you/confirmation page for e-commerce retailers.

If you set up more than one conversion action for your website such as transaction and lead, each conversion action will need its own event snippet code added.

For the global site tag, you will have three options on the code you install based on whether this is the first type of Google code you have installed; or you’ve already installed a global site tag from Analytics or if you are using Google Tag Manager.

Once you have the appropriate codes, you will need to determine how to add to your website header and confirmation page. Depending on what platform your website it built and hosted, the directions will vary. A Google search such as ‘adding google tracking tags to Shopify’ or ‘how to add AdWords tracking to Big Commerce’ will bring up links to detailed directions of how to add the code to your specific website platform.

Tracking Conversions Using Google Analytics

While Google AdWords tracking code gives advertisers the ability to track conversions from traffic generated from Google AdWords, by using Google Analytics advertisers can track conversions from all traffic sources.

Assuming you already have an active Google Analytics account, here are the instructions for starting to track conversions for an e-commerce website.

Assuming you already have an active Google Analytics account, here are the instructions for starting to track conversions for an e-commerce website.

  1. Login to your Google Analytics account.
  2. Click Admin (lower left corner).
  3. Select your account from the menu in the ACCOUNT column.
  4. Select a property from the menu in the PROPERTY column.
  5. Under PROPERTY, click Tracking Info > Tracking Code.

Like Google AdWords tracking code, you will have the option for either adding the global site tag or using Google Tag Manager.  If you already have the Global Site Tag on your page from AdWords, then you need to just add the ‘config’ line of code.

Once you’ve added the code, you will need to enable your e-commerce settings.

  1. Login to your Google Analytics account.
  2. Click Admin (lower left corner).
  3. In the VIEW column, click Ecommerce Settings.
  4. Set Enable Ecommerce to ON.
  5. Click Save.

These settings should allow you to start the basics of tracking for conversions.

The last step for those who use 3rd party checkout system such as PayPal, Google Pay or Apple Pay is to add those domains to the Referral Exclusion List. In order to use the ‘Referral Exclusion List’ navigate under PROPERTYTracking Info. Advertisers will want to add all URLs and variations to 3rd party checkouts they are using such as ‘paypal.com’, ‘applepay.com’ etc.

A quick side note for advertisers that setup tracking conversions in both Google AdWords and Google Analytics.

Where you can select the attribution model in Google AdWords (last click, first click, linear, time decay, position based or data-driven), Google Analytics uses last non-direct click attribution model for non-multi-channel funnel reports and last click model for multi-channel funnel reports.

This difference is attribution will create slight differences in reporting between the two systems.

Linking Google AdWords & Google Analytics

Once you have Google AdWords and Google Analytics tracking both properly configured you will want to make sure you link these accounts.

  1. Open Google Analytics.
  2. Click Admin and choose which account and property you’d like to manage.
  3. Under property, click AdWords linking.
  4. Click + New Link Group.
  5. Select the accounts you want to link.
  6. Enter your Link Group Title.
  7. Switch on all sites where you want AdWords data.
  8. Click link accounts.

By linking your AdWords and Analytics accounts you will be able to see AdWords conversions under Acquisition inside the Analytics dashboard.

Linking your accounts, also gives you the ability to import goals that are created inside Analytics into your AdWords account (a more advanced technique). For now, your account should be all configured with tracking e-commerce conversions.

Last bit of advice

For e-commerce companies it is critical to know exactly where sales are being generated and at exactly what advertising costs. Google gives advertisers the ability to track sales generated from AdWords as well as through other marketing channels through the proper use of Google Analytics absolutely free.

Properly installing your tracking however is just the beginning. Advertisers will need to keep a close watch on their conversions to make sure there are no sudden declines or spikes on any marketing channels and use AdWords tracking and the data gathered in order to optimize ads.

For my private clients, I am constantly using Google’s conversion tracking when working to fully optimize their product and search ads in order to generate maximum profitability.

Looking for More Information on Google Advertising?

Check out the all new The Academy of Internet Marketing (www.theacademyofinternetmarketing.com), the premier online destination for for small to mid-sized e-commerce businesses serious about substantially growing their online sales. Plus exclusive access to me, author of Make Each Click Count, The TOP Guide To Success Using Google AdWords.

If you have the dedication and are ready to take your online sales to the next level, then The Academy of Internet Marketing was created for you. It provides the tools in the form of knowledge of what works today. Join us and see what makes us special and together we will grow your business.

Complete Access To The Academy of Internet Marketing For $1

If you are ready to take your online advertising to the next level, I welcome you to take a trial. It only costs $1 for complete access for 2 full weeks.

Happy Marketing!

Andy Splichal

About The Author

This image has an empty alt attribute; its file name is Author2.jpg

Andy Splichal is an online marketing strategist with more than a decade and a half of experience helping companies increase their online presence and profitable revenues. Although this blog focuses on driving profitable traffic through Google AdWords, True Online Presence offers additional services for lead generation as well as other proven marketing strategies customized for each client.

Important Highlights from A Recent Google Account Review

A service that I offer through True Online Presence is a complete review of a company’s AdWords account. Coined the T.O.P. AdWords Assessment, this assessment includes having me spend 2-3 hours reviewing a Google Ads account structure and provide ratings on the account based on key metrics that I have found to strongly correlate with success.  

The key metrics that I use to rate an account’s health include: Match Type/Keywords; Adjusting Bids Device/Location; Segmenting Campaigns; Shopping Health (for e-commerce); Conversion Goals (for professional services); Activity Level; Ad Extensions, Ad Testing and Budgets.

Advertising on Google is unlike any other advertising medium as it can deliver red hot leads.

You can reach potential users while they are searching for an exact service or product. They can find you right in the middle of their buying process! However, like other marketing channels Google needs to be configured correctly and tended often to provide advertisers with optimal success.

A Recent Review

Last week, I had a company purchase an AdWords review. Due to my private client workload and running The Academy of Internet Marketing, I don’t accept too many T.O.P assessments anymore, but this was requested by a website design firm that I have known for quite a while.

They requested for one of their clients, a professional service company located in the Midwest spending about $200 a month in AdWords. Although not a huge monthly investment that still that comes to approximately $5K in the last 2 years and who wouldn’t want to make sure they are spending $5K prudently?

The reason that I choose to share this assessment was the due to the bare bones’ nature of their AdWords account which allows me to really detail in this article what is needed to run a successful Google marketing campaign.

First Some Background

The company, a legal entity, first started using AdWords 2 years ago. Professional Service companies are a bit different to evaluate than an e-commerce company as there is no add to cart button to press. Instead what is defined as a conversion is up to the advertiser to decide. This company had decided to define their sole conversion as phone call received.

Since inception 2-years ago, AdWords has generated 21 phone calls. For these call the company had paid $131 for each call generated (CPA – cost per acquisition).

Quick note, that with this sort of review I do not have the conversion statistics of how many of those calls became clients or how much a client is worth, I’m just looking at straight analytics based on data available and I am evaluating the account on the 7 key metrics listed above.

So, let’s get started…

Match Type/Keywords

One of the most important things a search campaign can utilize to be successful is the proper use of match type. Match type determines which keywords trigger an ad to appear. There are 5 match types – broad, phrase, exact, broad-match modifier and negative.

This account is using all broad match. Using broad match is going to bring in the most traffic, although also the most unqualified traffic. To be successful with eliminating unwanted searches especially with broad match, you need to be highly vigilant with the adding of negative keywords. Unfortunately, for this account there have been 0 negative keywords added.

Over the last 2 years, the broad match search terms ‘divorce & family law’ and ‘divorce and family law’ have racked up about $500 generating no phone calls/conversions.

These keywords in the broad match form has caused this attorney’s ads to appear for keyword searches such as ‘types of family law’ and ‘family law 61354’. With the average cost-per-click of about $4 it is important to not waste money on unrelated clicks.

I would recommend that this account change all their keyword match types to phrase and broad match modifier and use the search terms report to add negative keywords to block unrelated search terms.

For directions, I referred the company to the following articles:

Properly Using Keyword Match Types in Google Advertising

And

The Art of Adding Negative Keywords

Adjusting Location/Bid Device

This account is set to only bid in certain cities and counties where this firm offers services. When you look at a map this makes for an odd pattern. Unless they only can practice in certain counties, they may be better advised to add a search radius of X miles from a certain city.

For device, all 21 phone calls have been generated from mobile devices. Remember, the only conversion action being tested is phone calls.

I can see a phone extension for mobile ads, but not for desktop. They should expand the phone extension for desktop and may want to consider looking at a 3rd party phone tracking system such as Call Rail, so they can determine where not only Google calls are coming from, but all other phone calls generated from other marketing channels.

Segmenting Campaigns

A mistake that many companies make when creating their AdWords account is not having enough/segmented campaigns. This account is no different. There is only one campaign which is sending traffic directly to the home page.

This attorney offers custody services, divorce services, criminal law and other family law; however, all traffic is sending ads directly to the homepage regardless of which ad they click.

Making a user click around to find a specific service once they land on your website is a mistake. Related keywords need to be segmented into similar campaigns in order to have ads for specific keywords direct users to the exact service they are searching.

Conversions

The only conversion goal for this account is for a phone call.

If a user that clicks on the account and is not immediately ready to contact the attorney, they most likely will not make that call even if they may be semi-interested in the service.

Setting up different conversion goals such as a lead magnet will allow to capture contact information.

Examples would be offering a free report such as ‘The Top 10 Mistakes People Make When Choosing a Divorce Attorney’ or ‘The Top 10 Mistakes When Filing for Divorce’. A lead magnet is a great way to capture prospective client’s email or phone number and enables an advertiser to open a line of communication with potential clients.

Retargeting is also another very effective way to stay in front of a potential client. When a user goes to a website a ‘cookie’ is automatically placed on the user’s browser. This allows both professional services and e-commerce companies to use retargeting ads to those users after they leave the website and are browsing throughout the Google Display Network.

Here is a great article that I wrote referring to lead magnets that I encourage professional services to read:

Professional Services Sometimes Need to Give Away the Sizzle to Sell the Steak

Activity Level

Running ads on Google is not designed to be a set-it and forget-it strategy. Monitoring an account needs constant revisions for adjusting bids, adding new keywords based on searches and eliminating searches through negative keywords.

An account that is well managed should see at least weekly changes to bids and keywords as well as testing ads (more on that in the next section).

Using the change history tool, I’m showing a grand total of 27 changes in over 2 years. This is a definite sign of neglect in this account.

Ad Extensions

Ad extensions are snippets of information that Google allows advertisers to append to their ads. Relevant ad extensions for professional services include sitelink extensions, callout extensions, location extensions (great for professional services), call extensions, message extensions, structured snippet extensions and price extensions.

Read all about extensions in my article:

When It Comes to Your Google Ads, Size Does Matter

And

Why Google’s Newest Ad Extension Provides A Competitive Advantage

At a bare minimum, all advertisers whether professional service or e-commerce should be using call extensions, sitelink extensions and callout extensions on every ad.

Ad Testing

Google first introduced expanded ads in 2016 and have since updated the amount of text even further.

Currently, advertisers are allowed the following character limits:

  • Title/Headline 1 – 30 Characters.
  • Title/Headline 2 – 30 Characters.
  • Title/Headline 3 – 30 Characters.
  • Description Line 1 – 90 Characters.
  • Description Line 2 – 90 Characters.
  • Display URL + 2 optional paths – 15 Characters each.

The more information you can provide a potential client or buyer the more successful your ads are going to be in generating traffic. It is a mistake to not take advantage of all of space that Google allows when writing ads.

In addition, each ad group should contain a minimum of 3 ads optimized for show best-performing ads.

Google provides the testing inside their system, but you need to be running multiple ads for it to take effect. Over time, ads with higher click-through-rates (CTR) will automatically be served more thus increasing your CTR and increasing your Quality Score.

Having a high-quality score can greatly reduce the cost of ads over time.

For information on quality score, refer to my article:

Why Google Advertisers Need to Know Their Quality Score

Budgets

Budgets

When determining your daily budgets in Google Ads, you need to make sure of a couple of factors:

  1. You are comfortable spending the amount you set your daily budget over the month. If you set your budget at $10, for example, your daily spend could be up to double $20, but your total will not exceed an average of $10 for the month or $300 total ($10 x 30).
  • Especially if you are running profitable ads, you want to make sure you are capturing all available traffic. One of the most effective ways to do this is by viewing your Search Impression Share; the Impr. Top % (which is the percentage of time your ads appear above organic results) and the Search lost abs. top IS (budget), which shows how often your ads were not shown above organic results due to a low budget.

By combining these 3-key metrics, advertisers can determine if they have a high enough budget in place to capture all possible leads.

Last bit of advice

Google AdWords has a lot of moving parts that need to be considered when running a successful advertising campaign. One thing is for sure is in order to have superior results, you need to make sure you are constantly monitoring.

The good news is that many of your competitors are probably not optimizing using all the tools Google provides, so by monitoring and being aware of the key metrics listed above you will more than likely have a huge advantage over your competition.

The key metrics that I dig into when reviewing an AdWords account are in no way an exhaustive list of what can and ultimately should be done; however, they are what I consider to be the most important metrics of a well-run Google AdWords account.

Looking for More Information on Google Advertising?

Check out the all new The Academy of Internet Marketing (www.theacademyofinternetmarketing.com), the premier online destination for for small to mid-sized e-commerce businesses serious about substantially growing their online sales. Plus exclusive access to me, author of Make Each Click Count, The TOP Guide To Success Using Google AdWords

Complete Access To The Academy of Internet Marketing For $1

If you have the dedication and are ready to take your online sales to the next level, then The Academy of Internet Marketing was created for you. It provides the tools in the form of knowledge of what works today. Join us and see what makes us special and together we will grow your business.

If you are ready to take your online advertising to the next level, I welcome you to take a trial. It only costs $1 for complete access for 2 full weeks.

Happy Marketing!

Andy Splichal

ABOUT THE AUTHOR

This image has an empty alt attribute; its file name is Author2.jpg

Andy Splichal is an online marketing strategist with more than a decade and a half of experience helping companies increase their online presence and profitable revenues. Although this blog focuses on driving profitable traffic through Google AdWords, True Online Presence offers additional services for lead generation as well as other proven marketing strategies customized for each client.

Touring Google’s AdWords Interface

When an advertiser initially creates a Google AdWords account the interface may look intimidating.  Google has multiple menus and sub-menus on the top, in the middle and to the left of an account interface.  It is important for an advertiser to learn what each menu controls in order to fully optimize their account and implement advanced strategies that I share throughout my blog.  However, this post features the basics detailing what everything is and where it is located.

For those advertisers already familiar with the Google interface, I warn against dismissing this blog post too early.  Who knows?  By reviewing the basics, perhaps there is a gem to be discovered!

Google AdWords’ Top Menu

Google’s top menu includes the following text links: Home, Campaigns, Opportunities, Reports and Tools. In addition, the top menu includes two icon links: a gear icon that serves various administrative functions and a notification bell.

Google AdWords - Top MenuHome Link –

The Home link provides an overview (or will once data is available) of the account.  Like most Google sections, the Home section is highly customizable allowing advertisers to subdivide and analyze their past data using a variety of attributes with controllable date ranges. By default the Home interface also displays various useful reports including: ‘Good quality but low traffic keywords’ report; ‘Keywords below first page bid’ report;  ‘All enabled keywords’ report; ‘All non-active keywords’ report; ‘All enabled campaigns’ report; ‘All non-active campaigns’ report; ‘All enabled ad groups’ report and finally ‘All non-active ad groups’ report. All of these reports can be customized using a selection of performance and conversion attributes.

The Home interface provides an overall look into the health of a campaign which savvy advertisers would be wise not ignore. The above listed reports are an effective way advertisers can view insights of the account at a snapshot level.

Campaigns Link –

The Campaigns link is the default view when opening an AdWords account and where advertisers typically focus the majority of their efforts. Within the Campaigns link, various tabs control how an account is organized, what keywords trigger their ads and the ads themselves. It also includes a variety of different tabs that determine when a user will see an ad and how much it will cost if a user clicks on an ad. 

Tabs currently listed under the Campaigns link include: Campaigns, Ad Groups, Product Groups (shown only when a Google Shopping account is enable), Settings, Ads, Keywords, Audiences, Ad extensions, Auto targets, Dimensions and Display Network. Each tab is a lengthy discussion, but here we will focus on the basics with links to a various blog posts that provide additional details on each.

T.O.P. AdWords Campaign Review & Ratings SystemCampaigns Tab

Google uses a hierarchical system to organize accounts.  The highest level is Campaigns. Within a Campaign, advertisers are allowed to subdivide into Ad Groups where the keywords are added, stored and keyword bids are managed.

As a best-practice, only similar Ad Groups should be listed under the same Campaign, because settings typically are used to control at the Campaign level.  Settings controlled at the Campaign level include: status, budget, language, eligible networks, campaign start and end date, ad schedule, eligible devices, location and bid strategy.

Within the Campaigns tab, advertisers can add and remove campaigns.  In addition, advertisers can view data on all Campaigns simultaneously and have the ability to segment data, filter data, customize columns, edit status, change budgets, view auction insights, change bid strategies and automate by creating various rules for Campaigns. Finally, in the Campaigns tab, advertisers can also download reports and view Campaign change history.

Google AdWords - Campaign Tab

When viewing the Campaigns tab, Campaigns can be sorted by name, budget, status, impression, clicks, cost or any of the other attribute columns displayed.  In addition, advertisers can customize columns using the Columns drop down and modifying columns option.  This feature allows advertisers to add an array of attributes, each which will allow data to be sorted.

The broadest of views, the Campaigns tab provides an overall look at an account and should be used to examine historical data leading to broad changes that will affect the Ad Groups and Keywords found within each Campaign.

Ad Groups Tab

Ad Groups are subsections of Campaigns.  The Ad Groups tab displays all Ad Groups regardless of under which Campaign they are organized. Similar to the Campaigns tab, the Ad Groups tab allows data to be segmented, filtered and downloaded.  The Ad Groups tab also includes the ability to customize and sort columns using a vast list of attributes similar to the Campaigns tab.

The Ad Groups tab allows a closer look at historical data versus viewing data in the Campaigns tab.  Particularly helpful for advertisers with numerous Ad Groups within various Campaigns, the Ad Groups tab allows advertisers to quickly identify both successes and problems. Proper optimization needs to be based on historical data and by using the Ad Groups tab advertisers can quickly discover what is working and what is not working and optimize accordingly.

Products Groups Tab

Next, is Product Groups tab. Product Groups are similar to Ad Groups, except designed for Google Shopping opposed to Google Search. Product Groups are how Google Shopping campaigns are subdivided and will only appear when an advertiser has at least one Shopping campaign enabled. Just like the Ad Groups tab, the Products Group tab allows advertisers to filter data and download reports.  Columns are able to be modified to include an array of attributes and can be used to sort data.

The Products Groups tab is useful for looking at Shopping campaigns on a snapshot level with useful statistics that include impression share, benchmark CTR (how other advertisers are performing on similar products) and benchmark CPC (what other advertisers are bidding on similar products). By reviewing what competitors are doing, advertisers can determine based on their historical results whether current bids are competitive.

Settings Tab

Proper Settings are essential in laying the groundwork for the success of an account.  Without proper settings in place, it becomes difficult to achieve account profitability regardless of how well the other Campaign tabs are optimized.  For details about properly formatting a new campaign review my blog post – Proper Settings, The First Step To Successful Google Advertising.

Once Settings are configured, the Settings tab becomes important as a snapshot for all Campaigns. Current Settings can be reviewed based on status, budget, language, networks, start date, end date, ad schedule, device, location and bid strategy. These attributes allow advertisers to quickly access information about important metrics in all of their Campaigns opposed to needing to view each Campaign’s settings individually.

Like with the previous tabs, the Settings tab allows advertisers to modify columns and filter based on data displayed.

Ads Tab

Using the Ads tab, advertisers control how their ads appear.  When clicking first on the Ads tab, all ads are displayed.  By first clicking on a specific campaign and then the Ads tab, only ads for that Campaign will display. Likewise, by first clicking on an Ad Group and then the Ads tab, only ads for a specific Ad Group will display.

Ads are a vital part of any successful Google AdWords account.  They are the first and many times only impression your company shares with potential users and ads are what convinces users to visit your website rather than your competitors.  Creating compelling ads takes practice and testing, but it can be achieved.  For a description on writing successfully ad copy refer to my blog post – Creating Effective Ad Copy in Google AdWords.

Once an ad has been written, it is important to test results.  When an advertiser has multiple ads available for display, they can use the Google system to either Optimize for clicks (Google’s default); Optimize for conversions; Rotate evenly for 90 days and then optimize or Rotate indefinitely.

The option for rotating ads is found in the Settings tab, but I’m mentioning under this section since it is a vital piece of optimizing ads.  To access Ad rotation under the Settings tab, scroll down to Ad delivery: Ad rotation, frequency capping and click either the + to expand the selection or the Edit link if an Ad delivery selection has already been set.

Ad Rotation Setting In Google AdWordsOnce an advertiser has determined how they wish to rotate their ads, they should return to the Ads tab to create new ads and manage existing ads.

Within the Ads tab just like within the Campaigns and Ad Groups tabs, advertisers can segment, filter and add/remove columns to display. They can also download reports, view change history, automate rules, edit existing ads or create new ads.

To create a new ad, click on the red + AD button. A drop down will appear providing options for the type of ad the advertiser wishes to create.  Available options for new ads are Text ads, Dynamic search ads, Mobile app engagement ads, Call-only ads and Video ads.

Selecting Ad Type In Google AdWords

The most common ad type is a text ad.  Text ads are the non-image ads that display when a user does a search on Google. When creating text ads, it is important to note that ads can be written for desktop/laptop devices or specifically mobile devices.  If an advertiser plans on advertising across devices, it is important to optimize for each device as there are distinct differences which I review in my blog post – Optimizing Google Campaigns For Mobile.

Regardless of what device an advertiser is optimizing, the character limitations remain the same:

Title/Headline – 25 Characters.
Description Line 1 – 35 Characters.
Description Line 2 – 35 Characters.
Display URL – 35 Characters.

Ads can make or break the success of a Campaign.  Savvy advertisers should ensure they are creating multiple compelling ads with a defined call to action and continually test multiple ads and optimize based on results.

Keywords Tab

Keywords contained in an account will control when an advertiser’s ad will be eligible to display. Just like the Ads tab, advertisers have options in which keywords will display in their Google interface. To view all keywords in an account, click on the Keywords tab. By first clicking on a specific Campaign, only keywords for that Campaign will display and by first clicking on an Ad Group, only keywords for a specific Ad Group will display.

Before entering new keywords, an advertiser should understand keywords match type. Google currently supports five different match types: exact match, phrase match, broad match, broad match modifier and negative. In order to review how each match type works, review my blog post – Properly Using Keyword Match Types In Google Advertising.

Once familiar with the different match types and new keywords have been added to an account, advertisers can use the Keywords tab to optimize their Campaign. Within the Keywords tab just like with the Campaigns, Ad Groups and Ads tabs, advertisers can segment and filter data, download reports and customize columns.  In addition, advertisers can edit keyword match type, adjust bids, add new keywords, adjust bid type and add automated rules.

Within the Keywords tab, advertisers can find one of my favorite tools for optimizing campaigns and discovering negative keywords to add to an account. Located under the Details drop down is the option of Auction insights.

Accessing Keyword Details In Google AdWordsBy selecting All under Auction Insights, advertisers can review what user searches generated their ads to display and which keywords the display was attributed.  The date range on this view can be customized in order to discover trends and learn when and why ads are displaying.  By combing through past data, advertisers can find new keywords as well as unrelated keywords that are costing budget. Use these unrelated keywords to add to the negative keywords list and prevent ads from displaying for non-optimal searches. For specific details on adding negative keywords, refer to my blog post – The Art of Adding Negative Keywords.

Savvy advertisers should concentrate a great deal of effort within the Keywords tab. For it is here that individual keywords are not only added and match type determined, but also where individual keyword bid adjustment occurs. By raising or lowering bids on specific keywords, advertisers can optimize at a granular level using historical data as an indicator of future results.

Audiences Tab

Google defines an audience as a subset of past visitors to a website. Advertisers can use audiences to remarket ads (show ads to customers that have previously visited their website) as well as increase or decrease search bids to those users contained in an audience.  For more detailed information on increasing/decreasing bids based on audience in Search campaigns, see my blog post Merging Retargeting With Search Campaigns.

Not as common, but advertisers can also use the Audience tab to exclude users contained in an audience thus preventing them from being reshown ads.

In order to use the Audiences tab, an advertiser needs to first create either an interest or a remarketing list.  This list can be created either though using the Shared library link located on the left menu of the account (more about this later) or by using Google Analytics.  For detailed steps in using Google Analytics to create a remarketing list, again refer to my blog post Merging Retargeting With Search Campaigns.

Once a remarketing list or multiple remarketing lists have been created and added to the Audiences tab, advertisers have the ability to segment, filter, adjust attributes shown, edit or automate with rules. The Audience tab provides advertisers a powerful way to adjust bids to those more likely to buy, a.k.a. return visitors.

Ad Extensions Tab

Ad extensions are extra pieces of information Google allows advertisers to append to their ads. This extra information has the potential for high impact, low costs on an account’s success by leading to higher click through rates (CTR) and profitability.

Through the Ad Extensions tab advertisers can manage existing ad extensions, add new ad extensions or review past historical data with tools that allows data to be segmented, filtered and adjusted by adding or removing which attributes are displayed.

Google currently supports the following ad extensions: Sitelink extensions, Location extensions, Call extensions, App extensions, Review extensions, Callout extensions, Structured snippet extensions (new) and Automated extensions report.  For a detailed description on what each ad extension does, review my blog post – When It Comes To Your Google Ads, Size Does Matter.

Each ad extension has a purpose and their importance will depend upon the advertiser who uses them.  However, all ad extensions have no additional cost to use.  The cost per click is the same regardless if a user clicks on an ad with an ad extension of if a user clicks on an ad without no ad extensions. Therefore, best-practices suggest testing all applicable ad extensions in order to learn what results they generate. In fact, for some advertiser’s ad extensions have been seen to improve click through rates (CTR) in the neighborhood of 30%!

Auto Targets Tab –

Auto Targets are intended for use with dynamic ads.  Advertisers can use the Auto Targets tab to create auto targets based on all webpages, by category, by URL, by page title or by page content.  Note, only pages that have been actively indexed by Google are available for use with auto targets.

Once an advertiser has created Auto Targets, they must ensure they have also created a minimum of one dynamic ad in order for Auto Targets to function.  In order to create a dynamic ad return to the Ads tab, click on the red +Ad button and select Dynamic search ad.

Creating Dynamic Search AdsIn addition to creating a dynamic search ad, for Auto Targets to be eligible to run an advertiser will also need to activate the Dynamic Search Ads in the Settings Tab.  In order to enable, advertisers need to click on the Settings tab after viewing Campaign that the dynamic search ads is to run and scroll down near the bottom of the page under Advanced Settings and expand the Dynamic Search Ads.

Enabling Dynamic Search Ads In Google AdWords

Once the Dynamic Search Ads box opens, an advertiser will need to enter the website without the http or www and select the domain language and save.  This allows Google to scan the website, which is needed when using dynamic search ads.

Within the Auto Targets tab, advertisers can segment and filter data as well as adjust attributes shown by modifying columns. In addition, they can create and edit as well as review past search terms and categories. Seldom used, the Auto Target tab has the potential to provide a competitive advantage when properly implemented.

Dimensions Tab –

The Dimensions tab allows advertisers to slice and dice historical data in almost any way imaginable using historical data.  Although most tabs allow advertisers to review data, the Dimensions tab goes beyond what is available in the Campaigns tab, AdWords tab and even the Keywords tab.  All historical data is contained within the Dimensions tab and savvy advertisers should concentrate efforts to determine trends in order to fully optimize their account.

For examples of some best-practices when using the Dimensions tab, refer to my blog post – What Is That Mysterious Dimensions Tab In Google?

Detailed data of account history can be analyzed by popular views such as conversions, time, geographic, user location and search terms. Regardless of the view, data can be sorted from any of Google’s metrics in customizable columns.  Google’s metrics which include a variety of performance, conversion and competitive metrics can be added or removed by using the modifying columns option.

The Dimensions tab is an important tool for advertisers to use in order to discover trends used for optimizing an account’s success.

Display Network Tab

Google’s Display Network is a group of thousands of websites that are running advertisers ads created through Google AdWords. The Display Network tab is used only for those Campaigns set to use the ‘Display Network only – all features’, what Google used to refer to as Content ads.  For Campaigns using either Search or Shopping, the Display Network tab is not relevant.

Within the Display Network tab, advertisers can determine various targeting methods and exclusions determining where ads should display. In addition, advertisers have the ability to target users using contextual targeting, audiences and placement targeting. The Display Network tab once Display Network ads are running can be used to analyze past results based on either the Ad Groups or Campaigns contained within the Display Network.

Being able to create Display Network keywords, control placement along with the ability to view and manage demographics allows advertisers the needed ability to optimize their ads running in Google’s Display Network similar to tools provided for ads running in Google Search.

Opportunities Link –

Now that we have explored all the tabs contained within the Campaigns link, we will shift focus back to the top navigation links.  The next text link in the top menu is the Opportunities link.  Within the Opportunities link, Google provides accounts with automated suggestions. Common suggestions include lowering and raising bids, adding new keywords, setting location bid adjustments, creating new ad groups, raising and lowering budgets and suggestions for changes to ad copy.

Although it is best-practices to review the opportunities tab, keep in mind these are suggestions from Google that typically lead to increasing budget.  An advertiser should never blindly follow Google’s suggestions, but if suggestions are implemented remember to always monitor and test.  It is an advertiser’s responsibility to optimize their own account’s success and sometimes I have found Google’s “Opportunities” to be counterproductive with bottom line results.

Reports Link –

The Reports link provides access to a highly customizable section that allows advertisers to view and generate reports containing any and all historical data based on customizable time ranges. Reports can be displayed as tables, line charts, bar charts or pie charts and are easily exported. Generated reports can be emailed to multiple email addresses or downloaded and saved.

Google currently offers 15 predefined reports that include Basic, Time, Conversions and Geographic.  Each report can be customized and sorted by displayed attributes.  For more advanced marketers, reports can be generated from scratch, viewing only the attributes needed for their use by utilizing a simple drop and drag interface. All reports are easily saved once created, making them quickly accessible for future use.

The Reports link provides a great tool for marketers to review and share account progress and a useful tool in optimizing.

Tools Link –

The Tools link provides access to the following tools: Change History, Conversions, Attribution, Google Analytics, Google Merchant Center, Keyword Planner, Display Planner and Ad Preview and Diagnosis.

Change HistoryStores and reports all changes performed within an account.  A useful tool when determining reasons for why noticeable result changes might have suddenly occurred within a Campaign, Ad Group or Keywords.  Many changes are reversible when viewing Change History and can be reversed by clicking on the arched arrow under Undo status. However, note that some changes cannot be undone and if there is no arrow present that is the case.

Change History - Undo ActionThe Change History view has the ability to filter results based on Ad changes, Bid changes, Budget changes, Keyword changes, Status changes and Targeting changes.

ConversionsThe Conversions tool allows advertisers to control how conversions are counted in Google AdWords.  Conversions depend on advertising goals that can range from the sale of a product to a phone call or completion of a web form.  Regardless of what the conversion, it is important to create conversion tracking in order to properly optimize an account. For advanced marketers, this section also provides a tool for importing Google analytics goals and transactions.

AttributionAttribution can be found under the Tools link as well as within the Conversions drop down. Within the Attributions tool, advertisers can view data detailing the conversions goals and what actions customers performed before converting. 

Google AnalyticsA link to Google Analytics.  Google Analytics is a free analytics program provided by Google to AdWords advertisers. Formerly a fee based analytics tool named Urchin, Google purchased in April 2005 and has since offered it at no charge to advertisers.  Through Google Analytics, advertisers have the ability to review user behavior within their website.  An extensive program, Google Analytics allows advertisers to optimize and find holes in their conversion paths and is a powerful tool in website and conversion optimization.

Google Merchant CenterA link to Google Merchant Center. For advertisers to be eligible to advertise in Google Shopping they must first open a Google Merchant Center account, upload a data feed and link that account to their Google AdWords account.  This Google Merchant Center link under the Tools link allows advertisers to open their Google Merchant Center account directly from the AdWords interface (assuming the Merchant Center account has been linked).

Keyword PlannerThis tool uses the Google database to provide details on building new or expanding existing campaigns.  Ideal for laying the groundwork, the Keywords Planner allows advertisers the ability to search for new keywords, plan budgets and receive forecasts regarding new keywords. Google also provides estimated CPC, average monthly searches and competition level for suggested keywords.  Recommendations are based on advertiser’s criteria and once created they are able to be saved and downloaded or they can easily be added to an account.

Display PlannerSimilar to the Keyword Planner tool, the Display Planner tool is designed for ideas on running content ads in Google’s Display Network. The Display Planner tool provides advertisers with ideas to get started, impression updates and historical costs.  All recommendations are easy to export and share within an organization.

 Ad Preview and DiagnosisThis tool allows advertisers to perform searches to see how their ads are appearing when users do a search on Google.com.  However, rather than going to Google and performing a search, when using the Ad Preview and Diagnosis tool Google does not count the impression.  Not creating an impression is important because Google tracks each time there is an impression where an advertiser’s ad displays and whether or not it is clicked.  Numerous impressions without an ad click can lower the quality score for an ad.  For more information on quality score, review my blog post – Why Google Advertisers Need To Know Their Quality Score.

Another advantage of using the Ad Preview and Diagnosis tool rather than performing a search directly on Google to view ads is that by searching on Google advertisers will only be able to view how ads appear from their location with the device they are using. With the Ad Preview and Diagnosis tool, advertisers can view how their ads appear from any location or device. Finally, advertisers who use the tool will see their ads highlighted in blue with a note of whether or not an ad is currently displaying.

Gear Icon –

Located in the upper right of a Google account is a gear icon.  By clicking on the gear icon it displays a list of administrative functions for an account including: Billing, Account Settings, Linked Accounts, Send feedback and Help.  In addition, the Gear icon drop down displays Google’s toll free number used to access their help desk.

BillingUsed to access and advertiser’s transaction history, billing settings and billing profile.

Account settingsUsed to access account access, linked accounts, notification settings and preferences.

Linked accountsAlso accessible under Account settings, Linked accounts allows advertisers to link data from existing Google accounts including Google Analytics, Webmaster Tools, Google Play, YouTube and Google Merchant Center.

Send FeedbackAllows advertisers to quickly send a message to Google’s AdWords team for suggestions, ideas and problems.  Typically a Google representative will respond to inquiries within 48 hours.

HelpUsed to access Google’s AdWords database of help articles along with a number for Google support, live chat and email address.

Notifications Bell Icon – Automated messages from Google regarding unusual account activity and optimization suggestions.  Alerts can range from disapproved ad alerts to recommendations on increasing a specific Campaign budget.  Note, notifications also may appear in text boxes when an advertiser signs into their account.

T.O.P. AdWords Campaign Review & Ratings SystemGoogle AdWords Left Menu –

Now that we have finished reviewing the top menu and all sub-menus, we will focus on Google’s collapsible left menu.

Google AdWords Left Menu

Expandable and collapsible by using the double arrows, this menu contains a search campaigns box; a hyperlinked list of campaigns and text links to Shared library, Bulk operations, Reports and Labels.

Shared Library –

The Shared library link contains advanced tools to optimize accounts.  Contained within the Shared library link are sections for Audiences, Bid Strategies, Budgets, Business data, Campaign negative keywords, Campaign placement exclusions, URL options and Video remarketing.

AudiencesAllows advertisers to create remarketing list containing users that have visited their website or subsection of their website.  Audiences are needed in order to launch remarketing campaigns or for use within the Audience tab as described earlier.

Bid StrategiesAn interface to create and manage different bid strategies including Enhanced CPC, Target search page location, Target CPA, Target outranking share, Maximize clicks and Target return on ad spend.  In this section, current bid strategies can be segmented, filtered or customized by using the customize columns tool.

BudgetsUsing Budgets, advertisers can create a single budget to be shared across multiple Campaigns.  This is a useful tool when Campaigns are related enough that advertisers wish to draw off the same budget, but not related enough that they have the same Settings.

Business dataUsing business data, advertisers are able to link business data and feeds for use in ads, extensions or targeting. This tool works well in managing and adding various ad extensions.

Campaign negative keywordsAllows advertisers to create a list of negative keywords to be used across multiple Campaigns.  For detailed information, review my blog post – The Art of Adding Negative Keywords.

Campaign placement exclusionsIdeal for use when adverting in Google’s Display Network, the Campaign placement exclusions allow advertisers to create a list of websites to be excluded from placement across multiple Campaigns.

URL OptionsAllows advertisers to set account level tracking and auto-tagging.  Note, if tracking and auto-tagging are set at either the Campaign, Ad Group or Ad level those settings will override what is set using URL options.

Video RemarketingAllows advertisers to remarket with video ads to those users that have viewed their YouTube channel.

Reports –

The Reports link works in conjunction with the Reports editor located in the top menu.  When using the Reports link advertisers cannot create, but rather manage existing reports.

Labels –

Labels allow advertisers to organize items in an account into meaningful subsections.  For those advertisers using labels, this tool allows them to easily manage and report on labels at the Keyword, Ad, Ad Group or Campaign levels.

So that completes the tour!  Tedious perhaps, important absolutely.  Google provides all these tools in order for advertisers to have the ability to optimize their accounts.  Sadly many of these tools are often underutilized by a majority of Google advertisers.  As I continue to share advanced techniques it is important to have a full understanding of the basics and what tools are available when advertising using Google AdWords.

Still need help or looking for someone to bounce ideas off?  I am currently offering free marketing discovery sessions to those interested. Call True Online Presence at 1-888-456-6943 or schedule online.

Happy Marketing!

ABOUT THE AUTHOR:

Andy Splichal is an online marketing strategist  with more than a decade and a half of experience helping companies increase their online presence and profitable revenues.  Although this blog focuses on driving profitable traffic through Google AdWords, True Online Presence offers additional services for lead generation as well as other proven marketing strategies customized for each client.


Creating Effective Ad Copy In Google AdWords


Throughout previous blog posts I have touched on the subject of writing effective ad copy, however not in-depth. A well written, well placed ad is extremely vital to success when advertising in Google.  Therefore, I have dedicated this entire blog post on the subject along with some examples of great ads as well as ads that are well to be frank, not so great.

What Are Google Ads –

For advertisers wishing to advertise their product or service, a list of keywords they wish their ads to display and coordinating ads are required. Google limits ad size to specific character limits in order to display uniform ads to their users.  With all of the ads for different advertisers relatively the same size, it is up to the advertiser to use Google’s allotted character restrictions to differentiate their ads and persuade Google users to click on their ads.

Here are the current character limits of a Google Ad:

Title/Headline – 25 Characters.
Description Line 1 – 35 Characters.
Description Line 2 – 35 Characters.
Display URL – 35 Characters.

Why Writing Google Ads So Important?

For Google search, advertisers are charged each time a Google user clicks on an ad and is directed to their website.  Called the cost-per-click model or (CPC), the amount Google charges depends on how much the advertiser has bid in their campaign in conjunction with the quality score of their ad.  To learn about quality score, see my blog post – Why Advertisers Need To Know Their Quality Score.

T.O.P. AdWords Campaign Review & Ratings SystemAn ad that is not well written will end of doing damage to an advertiser’s marketing efforts in a number of ways:

First, the ad may not be clicked very often.  This will leave website traffic undiscovered which defeats the purpose of advertising.  This scenario often occurs when ads are not related to the search term even if the page that the ad would direct users is related.

Second, an ad may be too broad.  An ad that is too broad has the potential to deliver a ton of traffic, but not the right traffic.  This scenario will cost the advertiser money each time a user clicks with little or no results.  In addition, this scenario can create high bounce rates (a term when a user clicks on the back button after viewing the first page on the advertiser’s website).  Having high bounce rates will lower an ad’s quality score, which can result in Google charging more for each future user’s click on the ad as well as lower placement on the page.

What Is Included In A Well Written Ad?

  1. Ads should be relevant to the keyword term. Ideally, the keyword term would be in the ad’s headline or ad’s description or display URL or even better, all three. As a bonus, when the keyword is included in the ad headline or ad text, Google will typically bold the keyword in the ad.  However, if an advertiser is using 20-30 keywords in an ad group, including all keywords in the ads may not be possible (unless using dynamic insertion).  Therefore, at a bare minimum, an advertiser needs to ensure the ad is highly relevant to the search term for which it is displayed.
  2. Set expectations. An ad must convey what a user can expect once they click and are directed to an advertiser’s website. Ads that do not match their corresponding landing page, will result in high bounce rates and thus a low quality score.
  3. Include benefits and features of the product or service being advertised. Consumers need to be convinced of why they should click on an advertiser’s ad opposed to ads from their competitors.
  4. Include offers and be specific as possible. ‘Save 10%’ in the text is better than ‘Low Prices’ in the text, but ‘Low Prices’ in the text is better than no specifics at all.
  5. Ads should be unique from competitors advertising the same keywords. When creating an ad, advertisers should research and perform a search for their keywords.  If three advertisers are using the exact same headline, try something different.  By being different yet relevant, ads may gain higher click through rates which will ultimately improve quality score and lower what Google charges on a per click basis.
  6. Ads should be grammatically correct. Check for misspellings, poor grammar, etc.
  7. Ad relevant keywords to the end of the display URL. Google allows advertisers to append their URL, take advantage of this feature.
  8. Implement all relevant ad extensions. Google offers numerous ad extensions including sitelinks, call extensions, callout extensions and location extensions.  I can’t stress this enough, use them!!!  Properly implementing ad extensions can dramatically improve an ad’s click through rates and improve quality score.  For details on how to implement ad extensions, see my blog post – When It Comes To Your Google Ads, Size Does Matter.

T.O.P. AdWords Campaign Review & Ratings SystemAd Examples –

Now that we’ve looked at what ads are and some best-practices for writing, let’s take a look at some real life examples.  I did a search from my office in Pasadena for ‘dentists’ and below are examples of ads that were displayed.  Some were good and some were bad and some could be better. 

Here are the top three ads as appearing in the search query:

Dentist-Top-ExampleThe top three ads are for 1800 Dentist, Sherman Oaks Dentistry and Beverly Hills DDS.  Of the 3 ads listed, all use the keyword in the ad headline and 2 of the 3 ads have added the keyword ‘Dentist’ to the display URL, which is good.

However, out of the 3 ads there is a grand total of 1 ad extension being used.  Sherman Oaks uses a call extension, but that is it!  No location extensions, no site link extensions listing benefits, no callout extensions bringing more attention to benefits, NOTHING.  This is a complete waste of one of Google’s most effective tools, ad extensions. 

Did I also mention that I did this search from Pasadena, CA?  For those not familiar with Southern California, both Sherman Oaks and Beverly Hills are at least a 40 minute drive from Pasadena on a good day.  Will someone drive that far for a dentist when there are so many other quality dentists in Pasadena?  Maybe, but not likely.  For this industry, I would recommend against bidding in such a large geographical region unless you offer specialized services not commonly found.

I would rate these ads as a C+.

Let’s look at another ad.

Bad Ad Example for Google Search Dentist

This ad appeared in the right column next to the organic listings where ad extensions are not eligible to display, so it is not possible to tell if they have ad extensions active in their account.

However, again this is an ad for a dentist in Orange Country (an hour plus drive from Pasadena). This advertiser does use the keyword in the search title which is good, but what the heck is getting your teeth zoomed?  I’ve been going to a dentist for 40+ years and I’ve never heard of that term.  How many other potential patients searching for dentists have?  It is specific that it is only $399 and includes custom whitening trays, but speaking in dentistry lingo or any other industry lingo is a mistake and I would image the results on this ad to be poor.

I would rate this ad a D-.

One more ad example, courtesy of Smile Generation.

Good Example of AdWords Ad For Dentist

This ad again appeared to the right of the organic searches so it would not be eligible to display ad extensions, however they have done a lot right with this ad.

This advertiser uses the keyword in not only the ad headline, but also the ad text.  In fact, they list a benefit for the user in the headline along with using the keyword all while setting user expectations – ‘Find A Dentist Near You’.  The first description line conveys a unique message – ‘Trusted Source for Dentists Online’ and the second description line ‘Schedule An Appointment Today!’ provides a specific call to action.

I would rate this ad an A- only because they have not appended the keyword to the display URL; otherwise I would rate an A.

Summary –

These examples of good, bad and so-so ads are not unique to dentist advertising in Pasadena, CA.  Examples of each type of ad can be found in almost all searches done using Google that feature multiple ads.  This is great news for advertisers getting started or those who are writing well-constructed Google ads. 

By creating solid ads an advertiser will have an immediate advantage over most of their competitors.

Finally, make sure testing is done on ads.  Google allows advertisers to test multiple ads simultaneously and serve the ad with the highest click through rate more often than ads with lower click through rates.  Although you may feel you have written the perfect ad, still test. Potential customers will be the judge of the most effective ad based on the click through rates.  So pay attention and best of luck with driving traffic!

Still need help or looking for someone to bounce ideas off?  I am currently offering free marketing discovery sessions to those interested. Call True Online Presence at 1-888-456-6943 or schedule online.

Happy Marketing!

ABOUT THE AUTHOR:

Andy Splichal is an online marketing strategist  with more than a decade and a half of experience helping companies increase their online presence and profitable revenues.  Although this blog focuses on driving profitable traffic through Google AdWords, True Online Presence offers additional services for lead generation as well as other proven marketing strategies customized for each client.

Properly Using Keyword Match Types In Google Advertising

While creating a Google AdWords campaign an advertiser must enter a list of keywords for which they wish to have their ads display. As simple as that sounds, there are variances to adding keywords that will determine the number of impressions and clicks an advertiser’s campaign receives.  The type of keywords entered is a vital factor in determining impressions, clicks, spend and the overall success of advertising on Google.

Every month Google processes over 100 billion searches.  As amazing as that number is, it is equally amazing that on average 15% of those searches have never been previously searched, ever!  This is one reason why an advertiser cannot simply enter a list of keywords, but rather must enter a list of keywords and their match type in order to determine how they wish their ads to appear for any relevant search query.

Let me explain. Google currently supports five different match types: broad, phrase, exact, broad based modifier and negative.  Each match type has its advantages and which type will be the most effective is dependent upon the type of business using it, but generally it is a combination of match types within a campaign that proves to be the best option. 

The ability to determine match type gives marketers the tool to direct as granular or broad of traffic as they wish to their website.  It should be noted that the best match type is not going to be the same for all advertisers and continual testing is recommended.

Broad Match –

Broad match type is the most basic match type.  When using a broad match type, advertiser’s ads will be eligible to run on any search query that has the broad match word(s) or slight variances listed (slight variances include singular/plurals, misspellings, abbreviations and stem words). 

Example, if a marketer is using the broad match term – shoes, ads will be eligible to display for the following search queries: red shoes, women shoes, expensive shoes, cheap shoes, shoes sold online. Any query that contains the word shoe the advertiser’s ads will be eligible to show! 

As you can imagine, broad match type is going to deliver the most traffic; however it is also most likely to deliver the lowest return on investment (ROI), so use it wisely. Note, the broad match type is Google’s default if an advertiser does not specify one of the other match types listed below.

Phrase Match –

Phrase match is generated by added quotation marks around the keyword or keyword phrase. This match type will allow ads to be eligible for display if the search query matches the keywords or when additional words appear in the search query either before or after the keyword or keyword phrase. 

Example, if a marketer has a phrase match term – “red shoes”, ads will be eligible to display for the following queries: ‘buy red shoes’ or ‘red shoes on sale’.  However, ads will not appear if the query has the keyword phrase interrupted such as is the case with the search query – ‘red pretty shoes’. If an advertiser wishes their ads to trigger in this instance, they would need to use the broad match modifier match type (described below).

Exact Match –

An exact match type is generated by using brackets [ ] around keyword(s).  For exact match, the search query must match exactly your keyword or keyword phrase in order for ads to be eligible to display.

Example, if a marketer has an exact match keyword – [red shoes], only if the search query is ‘red shoes’ or a slight variance such as ‘red shoe’ will the keywords trigger an ad to display.  Using exact match keyword and keyword phrases will deliver advertisers the most targeted traffic of any match type and many times the highest ROI, although it will be the least traffic generated of any search type.

Broad Match Modifier

My favorite match type is the broad match modifier. The broad match modifier match type will trigger ads to display for more search queries than the phrase or exact match types while providing more control than a broad match search type. 

The broad match modifier search type is able to be used with single or multiple words.  It is generated by adding a (+) symbol directly in front of the word with no space between the (+) symbol and the word or words.  Once the (+) is added, each word or close variant (singular/plurals, misspellings, abbreviations and stem words) that is preceded by a (+) must be present in a search query in order for an ad to be eligible for display.

Similar to phrase match, a broad match modifier needs to have all the words in the query to appear, but unlike phrase match the order does not need to be the same. As an example, if a marketer uses the broad match modifier search term – +Red +Shoes, ads will be eligible to display even if the words within the broad match modifier are interrupted.  Queries such as ‘Red Unique Shoes’ will trigger ads to display just the same as queries that do not interrupt the broad match modifier keywords such as ‘Unique Red Shoes’.

Negative Keywords

Negative keywords are unlike the other match types in how they are setup, but may be the most important of the match types!  Negative keywords are words that advertisers can add that will cause ads NOT to display even if other match types are triggered.

Negative keywords are generated by adding a minus symbol (-) before any words that should be a negative keyword. Example, if there is the negative word ‘–used’ and a search query is done for ‘used red shoes’, an advertiser’s ad would not be display even if the campaign contained “red shoes” as a phrase match; +red +shoes as a broad match modifier or red shoes as a broad match.  The ad would also would not show for an exact match for [red shoes]; not because of the negative keyword ‘-used’ is present, but because the query ‘used red shoes’ of course is not an exact match for [red shoes].

The proper use of negative keywords is quite important in limiting unwanted traffic and costs. In fact negative keywords are so important that I’ve dedicated an entire blog post to the subject – The Art of Adding Negative KeywordsPlease review that post for complete details on how to implement negative keywords at the campaign as well as the ad group levels along with some best-practices and strategies.

Summary

In order to determine which match type will generate the highest return on investment, continual testing is required.  The proper use of match type is a delicate balancing act between generating traffic and generating a positive ROI.  Only through continual testing can advertiser discover the proper balance for their specific advertising campaign.  

Fortunately for advertisers, Google makes it easy to track results by implementing Google’s conversion tracking code.  Tracking conversions allows a marketer to determine directly in their AdWords account what costs and conversions are being generated at the keyword level. 

Note, while testing it is not recommended to change a keyword’s match type once listed as historical data will be permanently lost.  Instead, if an advertiser wishes to change a keyword’s match type, it is recommended that the original match type be paused and a new search term with the new match type be created.  This will preserve all historical data and hence allow a comparison of which match type provided better results.

An important tool Google provides in looking at match type on the historical level is the keyword search terms tool as seen in the image below.  By viewing search terms, advertisers can realize exactly which search queries have been driving traffic and how those queries are being matched with existing keywords.

Search-Terms-AllFor more additional instructions on how to access the keyword search terms tool and best-practices when using, read my blog post – The Art of Adding Negative Keywords.

Still need help or looking for someone to bounce ideas off?  I am currently offering free marketing discovery sessions to those interested. Call True Online Presence at 1-888-456-6943 or schedule online.

Happy Marketing!

ABOUT THE AUTHOR:

Andy Splichal is an online marketing strategist  with more than a decade and a half of experience helping companies increase their online presence and profitable revenues.  Although this blog focuses on driving profitable traffic through Google AdWords, True Online Presence offers additional services for lead generation as well as other proven marketing strategies customized for each client.