Skip to content

True Online Presence

  • Home
  • Basics
  • Google Shopping
  • eCommerce
  • Professional Services
  • Proper Maintenance
  • Advanced Techniques
  • Home
  • Basics
  • Google Shopping
  • eCommerce
  • Professional Services
  • Proper Maintenance
  • Advanced Techniques
True Online Presence

Tag: Creating An Account For Google Adwords

There Can Be No Google Shopping Without A Google Merchant Account {updated 1/14/20}

There Can Be No Google Shopping Without A Google Merchant Account {updated 1/14/20}

For many eCommerce merchants, Google Shopping is essential to their online sales strategy and new customer acquisition. With Google search ads becoming ever more expensive, many retailers are finding their best ROI opportunities with the implementation of properly optimized Google Shopping ads.

In order to fully optimize, advertisers adjust their Google Shopping product bids and segment their products within the Google Ads interface. For best-practices and effective strategies on optimizing Google Shopping within the Google Ads interface review my articles: Adjusting Google Shopping Bids For Individual Products, How Segmenting Google Shopping Campaigns Can Boost Profitability and Top Tips To Optimize Google Shopping.

However, before products are eligible to appear in Google Shopping products must first become eligible to appear. For products to become eligible to appear, they must be properly formatted and approved inside a Google Merchant Center Account. 

In addition, for advertisers wishing to advertise their products using Google’s Shopping Actions Program, creating a Merchant Center account is also required for participation.

The Basics – Google’s Merchant Center

A Google Merchant Center Account is an account that Google requires merchants open before they can have their products eligible to list within Google Shopping or Shopping Actions. It is where merchants upload their full product data containing information on the products, they wish to advertise within Google Shopping network.

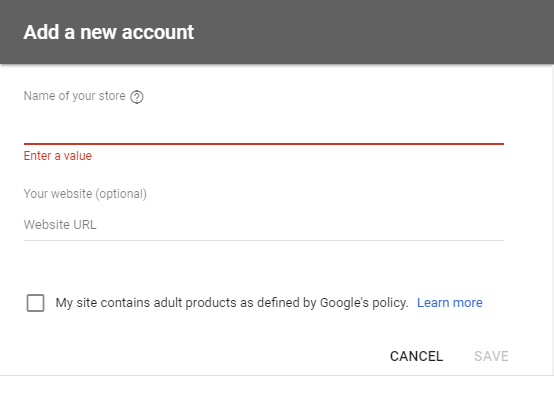
In order to get started, new advertisers need to create an account by visiting www.google.com/retail/solutions/merchant-center/ and clicking on the ‘Get Started’ button. When creating a new account, advertisers will be required to supply the name of their store, Website URL and whether the website contains content as defined by Google.

Next, an advertiser will need verify and claim the URL for the account they create.

In order to claim a website, owners have the options of adding some HTML code to their metatags, using information in their Google Analytics tags or information contained in their Google Tag Manager. Any of the methods will work and therefore it is left to the discretion of individual advertisers to select which method they prefer.

Once the tags are implemented, advertisers can quickly determine whether the process of claiming and verifying worked and if successful the site will change status to being verified and claimed. 

In addition, an advertiser can determine if their account has been successfully claimed and verified at any time, by clicking on the ‘Account Settings’ link under the Settings link (wrench icon) in the top menu.

Once an advertiser has claimed and verified their account, they will have full functionality throughout the account. However, to properly manage their Google Merchant Center Account, advertisers will need to understand the layout of where different options and settings are located.

Exploring Google’s Merchant Center Layout

Each Merchant Center account uses a left-hand menu that includes the following options: Overview, Orders (if Shopping Actions is enabled), Products, Performance (if Shopping Actions is enabled), Marketing and Growth.

Overview

The overview is a dashboard containing a quick snapshot of the account. Although, for new merchants the dashboard will be blank, for existing merchants the dashboard becomes an important snapshot into the health of the account. 

For advertisers with account history, the dashboard will display a summary overview of their products including a graph displaying active products, expiring products, products awaiting review and disapproved products for Surfaces across Google, Shopping Ads and Shopping Actions (if enabled). In addition, the dashboard will show a graph displaying the account’s paid click history as well as Google announcements.

Orders

This link will only appear for merchants who have been approved to have their products appear within Google’s Shopping Actions.

Within the orders section, merchants will find orders from Google Shopping Actions that are Pending, Pending Delivery and All Orders (history). The Orders link also contains historical return data again for Google Shopping Action orders only. 

Products

The Products link is going to be the most used of the links within the left-hand navigation. Within the Product link, merchants can access ‘Diagnostics’, ‘All Products’ and ‘Feeds’.

Diagnostics – This section shows advertisers any potential issues with products within their submitted data. Diagnostic information can be viewed based on destination (dynamic remarketing, shopping actions, shopping ads or surfaces across Google); although shopping ads is the default view. In addition, the diagnostics data can be viewed by the Country ads are served as well as by specific Feed.

Reviewing the Merchant Center’s diagnostics is essential in determining which products are eligible for display in Google Shopping and/or Shopping Actions. These insights are NOT available in the Google Ads interface and is one reason that reviewing the Merchant Center Account on a regular basis is highly recommended.

Diagnostics will provide the number of items currently disapproved, awaiting review, expiring and active. In addition, the diagnostics link contains information on the status of the account, feeds and individual items. If there are issues present in any of these areas, diagnostics will also generate links helpful for fixing listed issues as well as provide examples to items with current issues and the ability to download all items affected by listed errors.

In this account example, the diagnostics view contains links to affected items with errors in the feed. By clicking on the ‘View samples’ link an advertiser can determine how many of their products are currently being affected and by which issues. Note, that not all listed issues will keep products from being eligible for display; however, next to the issue Google will list if the error causes products to be disapproved or if this issue is a warning. 

All products – The ‘All products’ link allows advertisers to view all of their products. They can view details on individual products by clicking on the title.

In addition, advertisers can filter and search for specific data based on Title, ID, Price, Clicks, Condition, Availability, Status, Channel, Country or Language.

The ‘All products’ link is essential to use when confirming whether a specific product is listed and what attributes for specific products have been indexed into Google’s database. This can be done through this view quickly without the need to open and review the actual data feed.

Feeds – Within the feeds link, advertisers can review current feeds as well as create and schedule new feeds. Feed types are categorized into Primary Feeds and Supplemental Feeds.

Primary feeds are used by Google Merchant Center to upload product data via text (txt) files, XML (.xml) files, Google Sheets or the Google Center API.

Supplemental feeds are used by Merchant Center as a secondary data source to provide additional attributes to your primary feeds or to provide additional data to be used within Feed Rules.

For more information on Supplemental feeds, review my article – Using Supplemental Feeds in Merchant Center.

Once a data feed has been successfully uploaded, approved products are eligible to appear within the Google Shopping network for 30 days. So, at the absolute minimum merchants will need to re-upload their data monthly. However, typically for eCommerce merchants where their product information changes, in order to stay current with data, products will require more regular uploads typically daily or at least weekly.

The process of uploading a new data feed is the easy part of getting items approved in Google’s Shopping network. More involved is creation of the actual feed. Google currently supports 46 different attributes and although not all attributes are required it is recommended that advertisers populate as many fields as possible that are relevant for their products.

Current supported attributes include: link, title, description, price, sale_price, sale_price_effective_date, mobile_link, image_link, id, brand, condition, manufacturer, mpn, gtin, identifier_exists, shipping_weight, product_type, shipping, multipack, is_bundle, adwords_grouping, adwords_labels, excluded_destination, expiration_date, promotion_id, availability, availability_date, google_product_category, color, size, size_type, size_system, material, pattern, additional_image_link, age_group, gender, adult, item_group, custom_label_0, custom_label_1, custom_label_2, custom_label_3, custom_label_4, shipping_height, shipping_width, shipping_length and cost_of_goods_sold.

Don’t worry, there are 3rd party data optimization companies that work with advertisers for a nominal fee to set-up regular data feed uploads and populate different fields based on information currently contained within eCommerce websites.

Performance

The performance link will appear for retailers who have been approved to sell products through Google’s Shopping Actions program.

The performance view allows advertisers to keep track of retailer standards to make sure they are meeting Google Shopping Actions performance standards as well as keep track of Shopping Actions promotions.

Note, advertisers participating in Shopping Actions that meet top retailer status will have their items shown more often in Shopping Actions while those who consistently fall below standards may find their products eventually suspended from appearing within Google Shopping Actions.

Marketing

The marketing link contains Promotions and Product reviews. Both promotions and product reviews are free to use; however, you will need to request that they are enabled from the Google Shopping team before you see them in your Google Merchant Center console.

Promotions allow advertisers to stand apart from their competition who sell the same or similar products. A strategic way to bring added emphasis to product listings, review my article, Enhancing Google Shopping Using Promotions for details on creating and implementing promotions within Google Merchant Center.

For advertisers who collect product reviews, this feature allows their product ratings and reviews to be shown directly on their Google Shopping listing. Note, for a merchant to qualify to use product reviews they must have a minimum of 50 product reviews gathered within the last 12 months. In order to remain eligible, merchants will need to update their product reviews at least once per month through a data upload into their Google Merchant Center account.

Growth

The Growth link contains suggestions from Google to grow your account and includes Opportunities, Market insights, Shopping Actions insights (if approved) and Manage programs.

Opportunities – Lists where there may be potential opportunities to increase your traffic using Google Shopping. Examples of opportunities include fixing errors on historically high traffic Shopping ads.

Marketing insights – This view shows popular products on Google that you’re not currently advertising. In the “Personalized” view, the products are selected based on how similar they are to your most popular products and ranked based on how many clicks an ad for that product is likely to receive. Along with the products, you’ll also see prices for those products from other retailers.

The “Personalized” tab shows you products that you might want to advertise based on your current products, ranked by how many clicks an ad for that product would receive. These products are related to what you’re currently advertising.

Shopping Actions insights (for merchants who have been accepted into Shopping actions) – This view helps advertisers understand your price competitiveness on Shopping Actions and how you can win the buy-box. This view allows advertisers to filter by specific products in order to gain insight into which products they are winning buy box with Google Shopping Actions.

Manage programs – This view allows advertisers to easily manage which available features are enabled within their Merchant Center account. Currently available programs include Surfaces across Google, Shopping ads, Shopping Actions, Dynamic Remarketing, Customer Reviews, Local inventory ads, Merchant Promotions and Product Ratings.

Settings

The final option located as a Wrench icon in the upper menu is Settings. 

Settings are broken into two subcategories – Tools and Settings.

Tools consists of all the settings a merchant needs to complete in order to have their account approved. These include Shipping and returns, Sales tax, Business information, Payments, Shopping ads setup, Shopping Actions setup (if approved), Customer Reviews setup and Surfaces Across Google.

Shipping and returns – where a merchant formats their shipping and return information. Information submitted here needs to fully match what is listed on the website.

Sales tax – where a merchant formats where and at what rates they collect sales tax on orders.

Business information – The business display name along with address and customer service contact information.

Payments (merchants with Shopping Actions) – payment information of where Google will send settled money received from orders placed using Google Shopping actions.

Shopping ads setup – Information regarding participation in Google Shopping ads including notices, status and product/business information.

Shopping Actions setup (merchants with Shopping Actions) – Information regarding participation in Shopping Actions including notices, status and product/business information.

Customer reviews setup – Data about the number customers who have opted in and completed Google’s Customer Review surveys.

Surfaces across Google – Information regarding participation in Surfaces across Google including notices, status and product/business information.

The Settings subcategory includes Content API, Account settings, Account access, Preferences, Linked accounts, Automatic improvements and SFTP, FTP, GCS.

Content API – Historical data for the account regarding successful and failed API calls. This is where you can create a Google API Key for your Google Merchant Center account.

Account Settings – This includes time zone and language as well as account status and where you can close your account.

Account Access – Allows merchants to grant access to their Merchant Center account to different users that they wish to be able to access their account.

Preferences – Allows merchant to adjust access levels for various users and control levels of automatic notifications from Google.

Linked accounts – Allows you to link your Merchant Center Account to your Google Ads account. This must be done prior to being able to serve product ads within Google.

Automatic improvements – Allows merchants to enable automatic item updates for price, availability and both.

SFTP, FTP, GCS – Access to SFTP, FTP and GCS settings in order to be able to upload products directly into your Merchant Center account based on these available delivery methods.

Final Word

Although once a merchant has setup their Google Merchant Center Account and have their product data automatically and successfully updating, it can be tempting to forget about the Merchant Center and fully concentrate efforts on optimizing listings exclusively within the Google Ads interface.

Optimizing listings and categories within the Google Ads interface is essential to the success of Google Shopping Campaigns. However, equally important is the regular monitoring of the Google Merchant Center Account.

For it is only within the Google Merchant Center Account that advertisers can view issues related to their product data that may prevent items from being eligible to display; learn insights regarding other advertisers and configure account information such as shipping, tax and contact information.

For these reasons, without constantly monitoring your Google Merchant Center Account it will not possible to fully optimize your Google Shopping listings.

Looking for More Information on Google Advertising?

Check out the all new The Academy of Internet Marketing (www.theacademyofinternetmarketing.com), the premier online marketing destination for small to mid-sized e-commerce businesses serious about substantially growing their online sales plus exclusive access to me, author of Make Each Click Count, The TOP Guide To Success Using Google AdWords.

Complete Access To The Academy of Internet Marketing For $1

If you have the dedication and are ready to take your online sales to the next level, then The Academy of Internet Marketing was created for you. It provides the tools in the form of knowledge of what works today. Join us and see what makes us special and together we will grow your business.

If you are ready to take your online advertising to the next level, I welcome you to take a trial. It only costs $1 for access.

Happy Marketing!
Andy Splichal

ABOUT THE AUTHOR:

Andy Splichal is the founder of True Online Presence, the founder of The Academy of Internet Marketing, author and certified online marketing strategist with twenty plus years of experience helping companies increase their online presence and profitable revenues. To find more information on Andy Splichal, visit www.trueonlinepresence.com or read The Full Story on his blog, blog.trueonlinepresence.com

info@trueonlinepresence.com'Author True Online PresencePosted on January 29, 2016January 14, 2020Categories eCommerce, Google Shopping, Starting With BasicsTags Creating An Account For Google Adwords, Formatting Google Merchant Center, Google Merchant Center, Google Shopping, Google Shopping Campaigns, Google Shopping Management

Getting Started With Google AdWords

Getting Started With Google AdWords

So you have decided to start advertising on Google?  Most likely a good maybe even great decision if you have the resources to run a strategically optimized campaign.  Whether you are advertising an ecommerce company or a professional service business, running Google ads are an effective way to generate immediate traffic that is highly targeted.  Often referred to as a “red hot” leads, Google allows advertisers to set their maximum price per click per keyword as well as their overall campaign budget.

Throughout this blog site we demonstrate various advanced techniques used to properly optimize Google AdWords campaigns, but this post focuses on the absolute beginning stages of advertising with Google and opening a Google AdWords account.

Setting up an account with Google is extremely quick and easy.  In fact, advertisers can have their account created and their first campaign eligible for display in less than 15 minutes! 

The first step is to sign up for a Google AdWords account.  In order to signup, go to www.adwords.google.com.  Once you create an account, Google will guide new users through a four step process that includes information about your business, your first campaign, billing info and a review page.

4 Steps In Launching A New AdWords Campaign

During the setup phase, Google will ask users to set their daily budget, select advertising target locations, select which network(s) they would like their ads to appear, enter keywords, determine the amount they are willing to bid and write their first ad copy.

Google AdWords - Your First CampaignNew users should not overly stress about these settings.  None of the initial settings are set in stone (except time zone which we will cover later).  Once an account has been created everything is editable within the Google platform.  Therefore, I recommend making it simple and if an advertiser is not sure how to exactly configure their settings they should set the budget low and set the settings to the most commonly used.

T.O.P. AdWords Campaign Review & Ratings System

In the example below, I have set the initial budget to $1 per day, target location – United States, Networks – Search Network,  Keywords as a simple exact match for [True Online Presence] and an initial bid of $0.10 per click. Again, these settings can be changed once the account has been created; however values need to be entered in order for Google to allow the account to be created.

Example of Your First CampaignNext complete your billing information.  Google will ask advertisers to select how they would like to pay for traffic that is generated through the AdWords system. 

Advertisers have the option to use either automatic payments or manual payments. When automatic payments are selected, Google will charge an advertiser’s credit card after the charges are accrued (either 30 days after or once the balance reaches a pre-determined amount). For manual payments, advertisers can prepay a set amount.  Once the prepaid amount is depleted all of the advertiser’s ads will stop running until an additional payment is made.

Customers also have the option to determine if they wish to fund their account with a credit card or directly from their bank account.  Note, if an advertiser selects to pay directly from their bank account, the account will need to be verified before it is eligible to transfer funds.

There is then a box for an introductory offer.  Google from time to time offers incentives for advertisers to launch a new AdWords account.  For example, Google is currently offering $75 in free clicks once a new advertiser spends $25.  If interested in this promotion, please contact us for more information.

Finally on this page, an advertiser is asked to select their time zone. This is the only setting that cannot be changed later so double check that you set this correctly.  Save the billing info and advertisers have completed the last information needed to go live with a new account.

Google AdWords - Complete Billing InfoOn the final review page, Google will display all of the settings an advertiser has selected along with the initial ad, keyword(s) and billing information.

The very last step for new advertisers is to agree to the terms and service (printable if needed) and select the ‘Finish and create campaign’ button.  That’ it, congratulations your account is live!

Google AdWords Account Review


Quick warning, once you click the ‘Finish and create campaign’ button, your account is indeed live.  Your ads are eligible to be displayed and generally will begin displaying within hours.  Once ads are displaying, advertisers are responsible for the costs incurred on subsequent clicks. This is the reason why I recommend setting the budget both per click and per day at very low levels.

Remember once your account is active advertisers are allowed to change almost any setting except for the time zone preference. For a detailed look at how to properly setup initial settings, which can be done even after the initial account has been created, refer to my blog post – Proper Settings – The First Step of Successful Google Advertising.

Once an advertiser has set up the AdWords account, it is also highly recommend that they add Google Tracking code as well as Google Analytics code to the website. 

Google AdWords Tracking is important for Professional Service companies and absolutely essential for ecommerce retailers.  Google AdWords Tracking allows an AdWords account to display conversions on a granular level thus allowing campaigns to be properly optimized for cost/conversion and other important metrics.

To add Google AdWords Tracking, go to Tools in the top nav bar and select conversions.

Google AdWords TrackingThis will bring advertisers to a variety of options for tracking conversions.  Best-practices in setting up conversion tracking depends on the type of business – ecommerce vs. professional service, but properly applying AdWords Tracking is an essential start on the road to successful Google advertising.

To add Google Analytics, again go to Tools in the top nav bar and this time select Google Analytics.

Google-Analytics

Google Analytics is a free analytics tool that allows advertisers to view website data.  Being able to view website data allows advertisers much needed analysis and insights to their web traffic and customer behaviors. In addition, advertisers can link their Google AdWords account to their Google Analytics account which will enable advertisers to see dollar value of conversions, a statistic that is not readily available in Google AdWords.

Although a new advertiser can setup and have ads eligible to display in less than 15 minutes, the time needed to successfully optimize an account can be endless.  In fact, most likely an advertiser’s work will never be done when properly optimizing a Google AdWords campaign.  Even if an account is perfectly optimized today, customer behavior will most likely change tomorrow making it essential to continue to test and improve.

New advertisers are encouraged to read through this blog for advanced AdWords techniques broken out into 5 main categories: Advanced Techniques, Google Shopping, Ecommerce, Professional Services and Proper Maintenance.  In addition, I would encourage new advertisers to leave their email in the alert box in order to know each time we add a new post to this blog.

Still need help or looking for someone to bounce ideas off?  I am currently offering free marketing discovery sessions to those interested. Call True Online Presence at 1-888-456-6943 or schedule online.

Happy Marketing!

ABOUT THE AUTHOR:

Andy Splichal is an online marketing strategist  with more than a decade and a half of experience helping companies increase their online presence and profitable revenues.  Although this blog focuses on driving profitable traffic through Google AdWords, True Online Presence offers additional services for lead generation as well as other proven marketing strategies customized for each client.

info@trueonlinepresence.com'Author True Online PresencePosted on June 15, 2015November 9, 2015Categories Starting With BasicsTags Creating An Account For Google Adwords, Google AdWords, Launching Google AdWords
Do you want to
increase sales
?

Hey, I'm Andy Splichal,
author of Make Each Click Count,
I'm determined to make
businesses grow. My only question, is
will it be yours?
 

Learn How We Can Increase Your Business

Andy Splichal

Categories

  • About Us
  • Advanced Techniques
  • Conversion
  • eCommerce
  • Google Shopping
  • Professional Services
  • Proper Maintenance
  • Starting With Basics

Recent Posts

  • Negative Keywords: The Secret Weapon in Your Standard Shopping Campaign January 30, 2023
  • Building A Powerful USP That Gives You An Advantage November 3, 2022
  • Improving eCommerce Conversion Rates Using The Results Triangle October 15, 2022
  • End of An Era Using Google Expanded Text Ads July 11, 2022
  • Revealing Google’s Performance Max June 17, 2022
  • Home
  • Basics
  • Google Shopping
  • eCommerce
  • Professional Services
  • Proper Maintenance
  • Advanced Techniques
  • Home
  • Basics
  • Google Shopping
  • eCommerce
  • Professional Services
  • Proper Maintenance
  • Advanced Techniques
True Online Presence Proudly powered by WordPress