“Money For Nothing” was a smash hit from the mid-1980’s by the group Dire Straits.
As the story goes, the lyrics were inspired when a member of the music group overheard the comments from a delivery driver in the back of an appliance store as he watched a MTV music video.
The delivery driver’s comments included the classic lines from the song, “what are those, Hawaiian noises?…that ain’t workin”, and of course “money for nothing and chicks for free”.
Of course, those who know better realize the hard work needed for any performance especially a music video production.
I bring mention this song not only because it is one of my all-time favorites, but because last week Google announced that Google Shopping Actions would now be free for advertisers.
If you missed it, the announcement will affect those advertisers who have already either enrolled or have begun the enrollment process into Google Shopping Actions. For those retailers, Google Shopping Actions will now substantially reduce or even eliminate their fees.
Here was the important part of the email that many advertisers received last week:
Announcement sent from Google on 7/23/20
For those not familiar with the program, Shopping Actions are created using merchant listings inside Google Shopping. Within these listings the final payment transaction takes place through Google and Google takes a percentage of the sale rather than charging per click.
As a quick summary of that article, before last week’s change, Google would charge merchants 12% – 15% to process an order through Google Shopping. Once Google processed the payment, they would send merchants the order information through the merchant’s Google Merchant Center account.
To be eligible for Google Shopping Action, merchants would apply for the program and control their eligible product listings through Google Merchant Center.
Merchants participating using Google Shopping Actions have two options
First – you can enter their your payment processor and pay 0% commission. This will need to be done by February 21, 2021 to continue to serve ads using Google Shopping Actions.
Second, continue to use Google’s payment processor through 2/21/21 and pay a flat 5% commission.
Although good news for existing Google Shopping Action customers (either active or who have started the process); the Shopping Actions program is now closed until further notice for retailers who have not yet applied.
What is now available to all retailers is the ‘free’ clicks inside Google Shopping that Google announced in April of this year.
However, the free clicks are just like that rock band getting their money for nothin’ and their chicks for free. Although, it looks quick and easy to take advantage of this free traffic, it is still going to take a work.
Free clicks and paid clicks inside of Google Shopping as well as Shopping Actions clicks are all determined by which products a merchant uploads into their Google Merchant Center account.
The process of opening a Merchant Center account and submitting products to Google Merchant Center is where many advertisers especially those new to using Google Shopping may get confused.
It is also where I can help. I have dedicated the first section of my new book, Make Each Click Count Using Google Shopping, to properly configuring Google Shopping. Right now, you can immediately download the book for $5.96 and make sure you get started with the proper foundation.
In addition, I have recently created a new Facebook Group, Make Each Click Count Facebook Group. It is FREE to join and will give you immediate access to myself where I can answer any questions regarding the setup of your merchant account.
In fact, there are some questions others have asked in there that might be useful for you to check out as well:>
Remember To Stay Safe & Keep Healthy,
Looking for More Information on Google Advertising?
Check out the all new The Academy of Internet Marketing (www.theacademyofinternetmarketing.com), the premier online marketing destination trusted by small to mid-sized eCommerce businesses serious about substantially growing their online sales. In addition, The Academy of Internet Marketing includes exclusive access to me, author of the Make Each Click Count book series.
If you have the dedication and are ready to take your online sales to the next level, then The Academy of Internet Marketing was created for you. It provides the tools in the form of knowledge of what works today. Join us and discover for yourself what makes us special. Together we will grow your business!
After your Merchant Center has been approved and you have completed
the appropriate settings for shipping, tax, etc. it is a critical time. A time that
will play a major part in determining your success using Google Shopping. It is
time to create your plan for populating your product data inside Merchant
Center.
You will soon discover that having well formatted data is
going to be essential in order to properly segment campaigns inside the Google
Ads interface.
Updating Product Data in Merchant Center
To get started you need to submit the products to Merchant
Center that you want to have eligible to appear in Google Shopping. When
submitting your products, there are four options:
Google Sheets – You make all of the changes manually to the
product data using a Google Sheet. These changes are automatically applied to
your account once uploaded.
Schedule fetch – You host a data feed file on your website
and schedule a time for Google to fetch updates from the file. Once the fetch
occurs, Google applies updates to your products in Merchant Center.
Upload – This is the most common. With this method you keep
the file and schedule a regular upload into your merchant center using SFTP,
FTP, Google Cloud storage or a manual upload.
Content API – The Content API for Shopping enables merchants to automatically upload product listings using an API connection.
The Process of Submit Products
Unless you have just a handful of products that rarely
change in terms of inventory and pricing it typically is not viable to manually
create and update a product feed.
The good news is that there are many 3rd party Data
Optimization Companies that specialize in getting data from your website to
Merchant Center. The bad news is how do you know which data optimization
company is a good fit for your company and for your needs.
The better a data optimization company is the easier they
are going to make the process for merchants of taking data in their website and
easily customizing that data into Google’s different fields.
Here are currently the different fields that are supported in Google Shopping. Not all the fields below are required, but the more fields that you populate the better Google is going to be able to match your products to relevant customer searches.
Being able to populate all or at least as many of these
fields as possible is why using a 3rd party data optimization
company is usually an essential addition to your Google Shopping efforts.
Image if you have 5,000 products and after spending hours
creating your initial upload you need to make changes to just a couple of these
fields. It would take a long time, right?
Changes can be done using a data feed optimization company
in a matter for seconds or minutes instead of hours.
Most fields are not required. Only 13 fields are currently required
to have products approved in Merchant Center for non-apparel items and 20
fields are required for apparel items.
Note, some of the required apparel fields are only required in Shopping Actions not to be approved in Google Shopping. For information on Shopping Actions see my article – Google’s Shopping Actions – Changing The Landscape.
Choosing a Data Feed Optimization Company
Now that you have discovered why it is a good idea to partner
with a data optimization feed company, how do you select which company is right
for your business?
Typically, the price of this service can range from twenty
dollars to hundreds of dollars per month so choosing the right company is going
to depend on a few things:
Are you planning on using the data feed company to send your product feed to other comparison-shopping engines other than Google Shopping? Since Google Shopping is the largest comparison-shopping engine, typically all companies are going to have this feed well structured. The difference with the more expensive companies usually will be in how well they can structure the feeds going to other Shopping portals.
How does their system allow you to manipulate your data feed? The main purpose of using a data optimization company is to be able to easily populate your data feed. No matter what company you select there will be a learning curve; however, make sure you get a full overview as learning how to manipulate and submit your feed is essential.
Make sure you know how the company charges. Some data optimization feed companies charge additional based on how many products you have. Once you reach a certain number of products the monthly charge may start increasing.
Support is key. There is going to be a learning curve. Make sure whatever data optimization company you select offers full support in helping you get started as well helping with questions maintaining the health of your data feed moving forward.
Make sure you can easily review your feed. As time passes, you are going to want to be able to export your feed. With some data optimization companies that use an API, I have found that this is not possible.
Don’t sign a long-term contract! There are so many data optimization companies out there that don’t require a long-term commitment. There is no reason to be locked into anything other than a month-to-month agreement.
Working with Your Data
Once you have selected a data optimization company, the
first step is importing your products into their system. It is within the data
optimization company’s system, that merchants will format their feed and
manipulate the data populating as many of the fields above as possible.
Remember, the more fields you populate the more effective Google
will be in matching your products to related customer inquiries.
Also, start thinking about how it makes sense to segment
your products. Google provides the custom label fields in order to help their
advertisers segment their data.
The custom label fields serve no other purpose in your data
feed other than to organize your products, so feel free to enter whatever data
you want that will better help you segment your campaigns.
Assuming that by now you have already claimed and verified your Merchant Center and have completed your tax and shipping settings the last piece of completing your merchant center is submit your first product feed.
To begin submitting your first data feed you will need to navigate under Products in the left-hand menu to ‘Feeds’ and then click on the blue plus button under Primary feeds.
Next, you will select your country of sale, the language for the content of your feed and the destination in Google that you wish your products eligible to appear. As a default Shopping ads are checked, for information on how to have your products eligible to appear in Shopping Actions see my article – Google’s Shopping Actions – Changing The Landscape.
Then, you will name your Primary feed and select the input method. The input method is going to depend upon your data optimization company, but most likely will be the Upload option.
If you select the upload option, you will enter the name and
type of file exactly as it will appear coming from your data optimization
company. In order to be successfully processed, this must be exact.
In addition, you can upload your new file manually on this page to test if it will be accepted.
Now that your feed is created there are a couple more items
that you will need to format before your feed will be successfully submitted.
First, you will need to provide your data feed optimization company the ability to connect with your Merchant Center account. To do this you will need to provide them with your Merchant Center SFTP or FTP login credentials. To find these credentials, click on the wrench icon in the top tool bar and choose ‘SFTP/FTP/GCS’ under ‘Settings’.
Depending on how your partnered data optimization company
connects, this is where you will be able to find the needed credentials.
The last thing that generally causes an initial feed to fail
is the merchant not selecting their ‘Default currency’. This is the type of
currency used to sell products included in the feed.
In order to select, click on your feed name and click on settings. Under ‘Default currency’ you select your correct currency and save.
That’s it. Your feed should now be successful submitted into
Google Merchant Center. Google can take up to 72 hours to first process and
approve your items, so you will need to be patient. Soon you will be ready for
the really fun stuff – setting up your campaigns inside the Google Ads
interface!
Final Word
Creating your Merchant Account and formatting your
corresponding data feed is going to take some work. However, given that
products advertised in Google Shopping are producing some of the highest
returns on investment it is most likely worth the work.
As competition grows for advertisers using Google Shopping,
it is going to take more than just sending a partially developed data feed and
bidding the same for each item in Google Ads in order to be successful.
However, by fully developing your plan with your data feed
you will gain an immediate advantage over your competitors.
For those of you with a large number of product offerings or
product offerings that change frequently it will be essential to partner with a
solid data optimization company. Use the list above in this article to
determine the right fit and don’t delay. Customers are out there actively
searching for your products and you want to make sure they can find you!
If you have the dedication and are ready to take your online sales to the next level, then The Academy of Internet Marketing was created for you. It provides the tools in the form of knowledge of what works today. Join us and see what makes us special and together we will grow your business.
If you are ready to take your online advertising to the next level, I welcome you to take a trial. It only costs $1 for access.
One of largest obstacles in achieving profitability for many advertisers
using Google Shopping is the presence of unwanted keyword searches. Even
profitable Shopping campaigns are not immune to wasted ad spend due to the
nature of Google Shopping.
With Google Shopping the advertiser does not select their keywords as they do with their Search campaigns. Instead Google uses their proprietary algorithm to match a user’s Google search with an advertiser’s product ad. In order to match an advertiser’s product ad to serve inside Google Shopping results, Google uses a combination of keywords found in each product’s title and its product description. Then, Google uses a real-time auction based on an advertiser’s bid compared with other advertisers’ bids who have matching products to determine which order (ad rank) items appear in Google Shopping.
For the most part, this works well for advertisers as the keywords in the title and description determine when a product is eligible to appear, and the amount of an advertiser’s bid determines the order.
It also saves time for advertisers. Once a data feed is approved in
Google Merchant Center, products can begin running inside the Google Shopping platform
within minutes.
In fact, it is so easy to launch a new Google Shopping campaign that it
can be quite dangerous in terms of budget for the novice Google marketer.
For those advertisers wanting to optimize their campaigns for profit, the most effective tool in being able to eliminate unwanted searches is the proper use of negative keywords – see my article ‘The Art of Adding Negative Keywords‘.
Negative keywords can be applied at the ad group, campaign or multi-campaign level with the use of a negative keyword list. However, properly optimizing with negative keywords by using the search terms report can be a never-ending task of find and remove with the constant discovery of new unwanted search phrases.
A Better Way
For accounts that have products that are highly brand oriented there is
an easier way to eliminate approximately 80% of unwanted search terms without
the constant adding of negative keywords.
Interested?
It is called Positive Keywords.
One of the most effective strategies that I use for many of my private
clients who are brand centric, this strategy relies on a couple of things:
The Proper Segmenting of Google Shopping Campaigns.
The Use of Priority Settings.
Properly Segmenting Google Shopping Campaigns
With best-practices, Google Shopping campaigns should be subdivided just
like you do with Google Search Campaigns meaning into a subset of like
products. Since Google Shopping products rely on your data feed being supplied
to Google Merchant Center this is going to take some advanced planning and correctly
implementing that plan when formatting your Merchant Center feed.
However, by properly segmenting your campaigns advertisers will be able
to more easily control unwanted searches with negative keywords as well as be
able to better optimize bids for product ads based on historical data.
When configuring a Google Shopping campaign, Google allows for the use of
priority settings of high, medium and low. Priority settings like the name implies
takes priority over bids in determining which product Google serves from an
advertisers account.
The priority settings kick-in if either the same product is in 2
different campaigns or if 2 different products in 2 different campaigns have a
title/keywords that matches a Google search query.
Here is a quick written illustration:
Campaign A has a Priority Level of Low and
contains product XYZ with a bid of $0.50.
Campaign B has a Priority Level of Medium and also
contains product XYZ with a bid of $0.05.
Google is going to always display the product XYZ from Campaign B with
the bid of $0.05 instead of from Campaign A even though the bid for the same
product is 10X higher in Campaign A because of the priority level setting.
For detailed information on formatting your Priority Settings, read my
article ‘Knowing Your Priority Settings in Google Shopping’.
The Positive Keyword Strategy
Here is how the priority keyword strategy works.
I set a product group containing many related products typically products
grouped by manufacturer brand to high priority at a very low bid, say $0.01 in
an initial campaign – Call it Campaign A.
Then, I create another campaign containing the same products at either
medium or low priority and use a significantly higher bid, say $1 – Call this
Campaign B.
Within the high priority Campaign with bids set at $0.01 (Campaign A), I
add negative keywords for the branded terms as well as other high converting
search terms.
What this does is allow Campaign A to filter out keyword searches with
the use of negative keywords at a bid of $0.01. The keyword searches that
direct to Campaign A are typically keywords with a low chance of converting.
Thus, this strategy allows only high-converting, brand specific traffic
to be eligible to serve product ads in Campaign B. This greatly increases the
conversion rates, CTR and overall profitability of Campaign B allowing you to
increase bids and increase your Search Impression Share.
Now Campaign A, with its bid of $0.01 will still get a small bit of
traffic and some of that traffic may even convert. When a keyword term converts
in Campaign A, you can view the ‘Search’ terms report located within the
‘Keywords’ link on the left menu to add this keyword as a negative keyword to
Campaign A. When you add a keyword negative to Campaign A, it will allow future
searches for that converting keyword to be passed through to Campaign B.
This strategy works well to significantly improve the conversion rates
and the CTR, which also will increase the quality score of products ads in
Campaign B. Increasing the quality score of products ads will work to benefit
advertisers by helping lower their average cost-per-click regardless of bid.
A product ad with a high-quality score often may be shown in front of a competitor’s PLA ad in Google regardless of bid, thereby increasing overall profitability even further!
Google regardless of bid, thereby increasing overall profitability even
further!
Non-Theoretical Example
One of my private clients sells t-shirts and hats and one of their
biggest selling brands is John Deere. For there John Deere Shopping campaign,
we have found that keyword search terms containing John Deere convert while
there are hundreds of other search terms that do not or at least do not
profitably.
Therefore, by using the Positive Keyword strategy we can filter out all
keyword searches that do not contain John Deere from the John Deere Campaign.
Campaign A – We will name ‘Positive Strategy – John Deere’ and add all
John Deere product ads to this campaign with a bid of $0.01 and set the priority level to high. We will then add the negative
keywords as a phrase match “John Deere”.
Campaign B – We will name ‘John Deere – Standard’ and add all John Deere
product ads to this campaign with a bid of $0.50 and set the priority level to medium.
Since both campaigns have the same products all Google searches where
these products would be eligible to appear will be sent to the Positive
Strategy – John Deere campaign unless those searches contain the keyword term “John
Deere”.
Positive Strategy – John Deere campaign has a bid of $0.01 which allows
us to filter out all the unwanted keyword searches that we were receiving
non-specific keyword searches from John Deere – Standard at the cost of $0.01
per click!
With the positive keyword strategy in place, John Deere – Standard will
now receive traffic from search terms ONLY with the
term John Deere in them including terms such as ‘John Deere Hat’, ‘John Deere
Shirt’, Etc.
See how it works!
Last Word
Using Positive Keywords is most effective when advertising brand centric products or with enough historical data for an advertiser to absolutely know which keyword search terms do and which do not convert.
By using Positive Keywords an advertiser needs to make sure they are not eliminating substantial traffic that has the potential to generate significant profitable sales.
In addition, advertisers need to make sure all steps are properly completed when setting their priority levels, bids and negative keywords. If there is an error in the way settings are configured, the Priority Keywords method will not have the desired results.
You also will want to monitor your Positive Keyword campaigns for conversions as you will want to add to negative keywords in the Positive Strategy campaign if the campaigns receives a conversion.
Finally, even after Priority Keyword method is running properly it will still be necessary to monitor the keywords driving traffic and most likely continue to add negative keywords to your main campaign, just not as many:>
Looking for More Information on Google Advertising?
If you have the dedication and are ready to take your online sales to the next level, then The Academy of Internet Marketing was created for you. It provides the tools in the form of knowledge of what works today. Join us and see what makes us special and together we will grow your business.
If you are ready to take your
online advertising to the next level, I welcome you to take a trial. It
only costs $1 for access.
Happy Marketing!
Andy Splichal
ABOUT THE AUTHOR:
Andy Splichal is the founder of True Online Presence, author and certified online marketing strategist with more than a decade and a half of experience helping companies increase their online presence and profitable revenues. Find more information on Andy Splichal visit www.trueonlinepresence.com or at his read his blog, blog.trueonlinepresence.com.
Most often one of the least understood pieces of advertising using Google
Shopping is the continuous updating of product data to Google Merchant Center.
Far too often I have found when reviewing a retailer’s Google Ads account, they setup the Merchant Center; linked it to their Google Ads account and then never or almost never looked at it again. These accounts are often riddled with product disapprovals and inaccurate information.
Although your bidding optimizations are going to take place inside your
Google Ads interface, it is critical to keep the data in your Merchant Center up
to date. In addition to being accurate, there are tools that savvy Google
advertisers use to effectively managing product data.
One of my favorite tools that I use for my private clients is the use of
supplemental feeds.
Getting Started Using Merchant Center
Before you can begin advertising using Google Shopping, you need to first
properly configure your Google Merchant Center.
For those new to Google Shopping, properly configuring your Merchant
Center includes verifying and claiming your store, setting up tax and shipping
information and of course submitting products.
However, this article is written for those who are already running an approved
product feed and wish to customize the feed without making changes to the
original feed.
If that doesn’t quite make sense, no worries? I am about to explain.
Merchant Center Feeds
When uploading your products into Google Merchant Center, you will use
the feed section of your Merchant Center account. This section is split into
two sections: Primary Feeds and Supplemental Feeds.
The Primary Feed section is where you send the primary feed. The primary
feed contains all the data that advertisers use to list and optimize their
Google Shopping campaigns formatted into a delivery method that Google accepts.
There are quite a few options for an advertiser when submitting their
primary feed.
First, you need to select your country of sale, then the language and finally the destination of where you want your products ads to be eligible for display. The options include Display ads, Shopping ads, Shopping Actions (when activate) and Surfaces across Google.
Next, you name your primary feed and select how you are going to provide
the feed to Google.
Options for providing the data to Google include:
Using Google Sheets – Merchants create a Google
Sheet to hold the data and manually update the sheet as needed.
Schedule a Fetch – Merchants host the feed on their
own server and schedule a regular time for Google to fetch the feed from that
location.
Upload – (the most common used) – Merchants
typically using a 3rd party data optimization company to automate and
format the data along with scheduling a regular send.
Content API – (the second most commonly used) – Also
typically done through a 3rd party data optimization company. This
method transfers the data through an API connection directly into merchant
center.
Once you decide on how to get the data to Google, you then need to name
the feed and create the initial feed. Some of the settings such as the Default
Currency setting will need to be properly specified in order to have the feed approved
by Google.
Supplemental Feeds
Once your primary feed is up and running with products being approved, advertisers may feel the need to update data for a subset of the products in the feed without updating the entire primary feed.
If that doesn’t quite make sense again, no worries. I am about to again
explain.
For the example below, I am going to demonstrate using a supplemental feed to exclude some of the products from being eligible to appear in Google Shopping ads.
Besides being able to exclude items, you can update products using a
Supplemental feed for any of the over 50 fields supported by Google Merchant
Center.
Supplemental feeds are particularly useful to merchants with thousands of
products that are being submitted when they only want to edit a subset of those
products. Using a Supplemental feed allows information on a large feed to be
overwritten with data in a smaller, easy to manage Supplemental feed file.
One of the ways I use supplemental feeds for my private clients is to
exclude a small subset of products from being eligible to appear in one of the four
supported shopping channels – Display ads, Shopping ads, Shopping Actions (when
activated) or Surfaces across Google.
Other times a Supplemental feed may be useful is when it is not possible
to map custom labels for some reason inside a primary feed or for that matter
any of the other 50 supported fields that need to be changed for a subset of
the primary feed.
In this example, I’m going to use a supplemental feed to make some products
ineligible to appear within Shopping ads using a Google Sheet.
Creating a Supplemental Feed
The first step is inside Merchant Center to navigate to Products, then Feeds and click on the blue ‘Add Supplemental Feed’ link.
You will then name the feed and select the method for which you would
like to submit the data to Google Merchant Center. For this example, I’m going
to use Google Sheets.
Google Sheets is like Excel; however, instead of storing the file on your
computer it is stored under Google’s cloud storage. Google sheets therefore do
not take up any storage room and best of all Google sheets are absolutely free
to create, use and modify. A Google sheet simply attaches to the same Google
account that you use when accessing your Google Ads Account.
In order to create a Google Sheet, you first will want to name your Supplemental feed with a name that helps you recognize the purpose of the feed and then choose how you would like to deliver the data to Google.
Then, you will select whether you want to generate a new Google sheet or
select an existing Google sheet.
Since I am creating from scratch, I’m going to select a generate new Google sheet and click on continue.
You will then want to select the primary feed that you will want to override data in with the new supplemental feed and select continue.
Google will then automatically create your supplemental feed along with a link to open the feed.
Once you open the Google sheet using the blue ‘Open’ link under in the
Input method the Google sheet will open, and you can manually add data to the file.
When adding data, you will want the first row to be the header row. This
row should contain id in the first column (this is what Google will use to
match the data in your supplemental feed with the data in the primary feed).
The next columns will be the header for the supported fields that you want to
override in the primary feed using the new supplemental feed.
For this example, I am using Excluded_destination in order to tell Google
that certain items should not be eligible to appear inside Shopping Ads.
Note, in this example, I’m overriding only one field, excluded_destination, but you can override multiple fields at the same time using a supplemental feed. In order to do so, you need to add additional columns, where the header row contains the field you wish to override with the data underneath.
After the Google sheet is saved for the Supplemental feed to take effect, you are going to have to go back to your feeds and click on the Supplemental feed you just created.
Once opened, you will need to click on the ‘Fetch Now’ link in the upper right.
Once you click the Fetch Now link, Google will import your data and override product data in the original primary feed. Give the feed a few minutes to populate and you should see how many records were successfully populated.
As you can see above, all 27 items that we added were successfully
populated!
Checking That Everything Is Working
In order to check to see if that the Supplemental feed has taken affect, you will want to click on ‘All products’ link in the left tool bar and then you can filter by one of the ids in your new Supplemental feed.
If you click on the item, all the details for this item as stored in Google Merchant Center will display.
For the purpose of our example, we can see right near the top that the
item no longer is appearing on Shopping ads. However, if you changed other
fields in the primary feed, you will need to scroll down on the page to see how
different fields are now being displayed.
That is it. Congratulations you now have another highly effective tool
for being able to quickly manage the data in your Google Merchant Center!
Last bit of advice
Knowing how
your Google Merchant Center pulls in product data is essential to gaining a huge
leg up on your competition. Although, all the bidding is done within your
Google Ads interface, only products that are approved in your Merchant Center
will become eligible to appear in your Google Shopping campaigns.
If you are
not checking your Google Merchant Center often, you could be doing yourself a
real disservice in terms on not monitoring new disapprovals and other issues
that will inevitably arise within Merchant Center.
Providing
strategically formatted data to Google Merchant Center makes it much easier to
control product listings and allows for the best chance for success using
Google Shopping.
And now that you know how to quickly control a subset of your products using a Supplemental feed, you have an effective way to manage your products including showing which products are and are not eligible to appear within different channels.
Looking for More Information on Google Advertising?
Check out the all new The Academy of Internet Marketing (www.theacademyofinternetmarketing.com), the premier online destination for for small to mid-sized e-commerce businesses serious about substantially growing their online sales. Plus exclusive access to me, author of Make Each Click Count, The TOP Guide To Success Using Google AdWords.
Now included within The Academy of Internet Marketing is a video tutorial detailing the creation up a supplemental feed as described in this article.
If you have the dedication and are ready to take your online sales to the next level, then The Academy of Internet Marketing was created for you. It provides the tools in the form of knowledge of what works today. Join us and see what makes us special and together we will grow your business.
If you are ready to take your online advertising to the next level, I welcome you to take a trial. It only costs $1 for complete access for 2 full weeks.
Happy Marketing! Andy Splichal
About The Author
Andy Splichal is an online marketing strategist with more than a decade and a half of experience helping companies increase their online presence and profitable revenues. Although this blog focuses on driving profitable traffic through Google AdWords, True Online Presence offers additional services for lead generation as well as other proven marketing strategies customized for each client.
For many eCommerce merchants, Google Shopping is essential to their
online sales strategy and new customer acquisition. With Google search ads
becoming ever more expensive, many retailers are finding their best ROI opportunities
with the implementation of properly optimized Google Shopping ads.
However, before products are eligible to appear in Google Shopping
products must first become eligible to appear. For products to become eligible
to appear, they must be properly formatted and approved inside a Google
Merchant Center Account.
In addition, for advertisers wishing to advertise their products using
Google’s Shopping Actions Program, creating a Merchant Center account is also
required for participation.
The Basics – Google’s Merchant Center
A Google Merchant Center Account is an account that Google
requires merchants open before they can have their products eligible to list within
Google Shopping or Shopping Actions. It is where merchants upload their full
product data containing information on the products, they wish to advertise within
Google Shopping network.
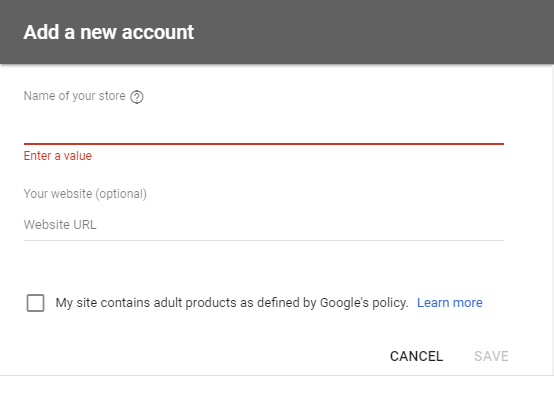
In order to get started, new advertisers need to create an account by visiting www.google.com/retail/solutions/merchant-center/ and clicking on the ‘Get Started’ button. When creating a new account, advertisers will be required to supply the name of their store, Website URL and whether the website contains content as defined by Google.
Next, an advertiser will need
verify and claim the URL for the account they create.
In order to claim a website,
owners have the options of adding some HTML code to their metatags, using
information in their Google Analytics tags or information contained in their
Google Tag Manager. Any of the methods will work and therefore it is left
to the discretion of individual advertisers to select which method they prefer.
Once the tags are implemented,
advertisers can quickly determine whether the process of claiming and verifying
worked and if successful the site will change status to being verified and
claimed.
In addition, an advertiser can determine if their account has been successfully claimed and verified at any time, by clicking on the ‘Account Settings’ link under the Settings link (wrench icon) in the top menu.
Once an advertiser has claimed and verified their account, they
will have full functionality throughout the account. However, to properly
manage their Google Merchant Center Account, advertisers will need to understand
the layout of where different options and settings are located.
Exploring Google’s Merchant Center Layout
Each Merchant Center account uses a left-hand menu that includes
the following options: Overview, Orders (if Shopping Actions is enabled),
Products, Performance (if Shopping Actions is enabled), Marketing and Growth.
Overview
The overview is a dashboard containing a quick snapshot of the
account. Although, for new merchants the dashboard will be blank, for existing
merchants the dashboard becomes an important snapshot into the health of the
account.
For advertisers with account history, the dashboard will display a summary overview of their products including a graph displaying active products, expiring products, products awaiting review and disapproved products for Surfaces across Google, Shopping Ads and Shopping Actions (if enabled). In addition, the dashboard will show a graph displaying the account’s paid click history as well as Google announcements.
Orders
This link will only appear for merchants who have been approved to
have their products appear within Google’s Shopping Actions.
Within the orders section, merchants will find orders from Google Shopping Actions that are Pending, Pending Delivery and All Orders (history). The Orders link also contains historical return data again for Google Shopping Action orders only.
Products
The Products link is going to be the most used of the links within the left-hand navigation. Within the Product link, merchants can access ‘Diagnostics’, ‘All Products’ and ‘Feeds’.
Diagnostics – This section shows advertisers any potential issues with products within their submitted data. Diagnostic information can be viewed based on destination (dynamic remarketing, shopping actions, shopping ads or surfaces across Google); although shopping ads is the default view. In addition, the diagnostics data can be viewed by the Country ads are served as well as by specific Feed.
Reviewing the Merchant Center’s diagnostics is essential in
determining which products are eligible for display in Google Shopping and/or
Shopping Actions. These insights are NOT available in the Google Ads interface
and is one reason that reviewing the Merchant Center Account on a
regular basis is highly recommended.
Diagnostics will provide the number of items currently disapproved, awaiting review, expiring and active. In addition, the diagnostics link contains information on the status of the account, feeds and individual items. If there are issues present in any of these areas, diagnostics will also generate links helpful for fixing listed issues as well as provide examples to items with current issues and the ability to download all items affected by listed errors.
In this account example, the diagnostics view contains links to affected items with errors in the feed. By clicking on the ‘View samples’ link an advertiser can determine how many of their products are currently being affected and by which issues. Note, that not all listed issues will keep products from being eligible for display; however, next to the issue Google will list if the error causes products to be disapproved or if this issue is a warning.
All products – The ‘All products’ link allows advertisers to view all of their products. They can view details on individual products by clicking on the title.
In addition, advertisers can filter and search for specific data based on Title, ID, Price, Clicks, Condition, Availability, Status, Channel, Country or Language.
The ‘All products’
link is essential to use when confirming whether a specific product is listed
and what attributes for specific products have been indexed into Google’s
database. This can be done through this view quickly without the need to open
and review the actual data feed.
Feeds – Within the feeds link, advertisers can review current feeds as well as create and schedule new feeds. Feed types are categorized into Primary Feeds and Supplemental Feeds.
Primary feeds are used by Google Merchant Center to upload product data via text (txt) files, XML (.xml) files, Google Sheets or the Google Center API.
Supplemental feeds are used by Merchant Center as a secondary data source to provide additional attributes to your primary feeds or to provide additional data to be used within Feed Rules.
Once a data feed has been
successfully uploaded, approved products are eligible to appear within the
Google Shopping network for 30 days. So, at the absolute minimum
merchants will need to re-upload their data monthly. However, typically
for eCommerce merchants where their product information changes, in order to
stay current with data, products will require more regular uploads typically
daily or at least weekly.
The process of uploading a new
data feed is the easy part of getting items approved in Google’s Shopping
network. More involved is creation of the actual feed. Google currently
supports 46 different attributes and although not all attributes are required
it is recommended that advertisers populate as many fields as possible that are
relevant for their products.
Don’t worry, there are 3rd party
data optimization companies that work with advertisers for a nominal fee to
set-up regular data feed uploads and populate different fields based on
information currently contained within eCommerce websites.
Performance
The performance link will
appear for retailers who have been approved to sell products through Google’s Shopping
Actions program.
The performance view allows advertisers to keep track of retailer standards to make sure they are meeting Google Shopping Actions performance standards as well as keep track of Shopping Actions promotions.
Note, advertisers participating
in Shopping Actions that meet top retailer status will have their items shown
more often in Shopping Actions while those who consistently fall below
standards may find their products eventually suspended from appearing within
Google Shopping Actions.
Marketing
The marketing link contains Promotions and Product reviews. Both promotions and product reviews are free to use; however, you will need to request that they are enabled from the Google Shopping team before you see them in your Google Merchant Center console.
Promotions allow advertisers to stand apart from their competition who sell the same or similar products. A strategic way to bring added emphasis to product listings, review my article, Enhancing Google Shopping Using Promotions for details on creating and implementing promotions within Google Merchant Center.
For advertisers who collect
product reviews, this feature allows their product ratings and reviews to be
shown directly on their Google Shopping listing. Note, for a merchant to
qualify to use product reviews they must have a minimum of 50 product reviews
gathered within the last 12 months. In order to remain eligible, merchants will
need to update their product reviews at least once per month through a data
upload into their Google Merchant Center account.
Growth
The Growth link contains
suggestions from Google to grow your account and includes Opportunities, Market
insights, Shopping Actions insights (if approved) and Manage programs.
Opportunities
– Lists where there may be potential opportunities to increase your traffic
using Google Shopping. Examples of opportunities include fixing errors on
historically high traffic Shopping ads.
Marketing
insights – This view shows popular products on Google that you’re not currently
advertising. In the “Personalized” view, the products are selected
based on how similar they are to your most popular products and ranked based on
how many clicks an ad for that product is likely to receive. Along with the
products, you’ll also see prices for those products from other retailers.
The
“Personalized” tab shows you products that you might want to
advertise based on your current products, ranked by how many clicks an ad for
that product would receive. These products are related to what you’re currently
advertising.
Shopping
Actions insights (for merchants who have been accepted into Shopping actions) –
This view helps advertisers understand your price competitiveness on Shopping
Actions and how you can win the buy-box. This view allows advertisers to filter
by specific products in order to gain insight into which products they are
winning buy box with Google Shopping Actions.
Manage
programs – This view allows advertisers to easily manage which available
features are enabled within their Merchant Center account. Currently available
programs include Surfaces across Google, Shopping ads, Shopping Actions,
Dynamic Remarketing, Customer Reviews, Local inventory ads, Merchant Promotions
and Product Ratings.
Settings
The final option located as a Wrench icon in the upper menu is Settings.
Settings are broken into two
subcategories – Tools and Settings.
Tools consists of all the
settings a merchant needs to complete in order to have their account approved.
These include Shipping and returns, Sales tax, Business information, Payments,
Shopping ads setup, Shopping Actions setup (if approved), Customer Reviews setup
and Surfaces Across Google.
Shipping and returns – where a merchant formats their shipping and return information. Information submitted here needs to fully match what is listed on the website.
Sales tax – where a merchant formats where and at what rates they collect sales tax on orders.
Business information – The business display name along with address and customer service contact information.
Payments (merchants with Shopping Actions) – payment information of where Google will send settled money received from orders placed using Google Shopping actions.
Shopping ads setup – Information regarding participation in Google Shopping ads including notices, status and product/business information.
Shopping Actions setup (merchants with Shopping Actions) – Information regarding participation in Shopping Actions including notices, status and product/business information.
Customer reviews setup – Data about the number customers who have opted in and completed Google’s Customer Review surveys.
Surfaces across Google – Information regarding participation in Surfaces across Google including notices, status and product/business information.
The Settings subcategory
includes Content API, Account settings, Account access, Preferences, Linked
accounts, Automatic improvements and SFTP, FTP, GCS.
Content API – Historical data for the account regarding successful and failed API calls. This is where you can create a Google API Key for your Google Merchant Center account.
Account Settings – This includes time zone and language as well as account status and where you can close your account.
Account Access – Allows merchants to grant access to their Merchant Center account to different users that they wish to be able to access their account.
Preferences – Allows merchant to adjust access levels for various users and control levels of automatic notifications from Google.
Linked accounts – Allows you to link your Merchant Center Account to your Google Ads account. This must be done prior to being able to serve product ads within Google.
Automatic improvements – Allows merchants to enable automatic item updates for price, availability and both.
SFTP, FTP, GCS – Access to SFTP, FTP and GCS settings in order to be able to upload products directly into your Merchant Center account based on these available delivery methods.
Final
Word
Although once a merchant has
setup their Google Merchant Center Account and have their product data
automatically and successfully updating, it can be tempting to forget about the
Merchant Center and fully concentrate efforts on optimizing listings
exclusively within the Google Ads interface.
Optimizing listings and
categories within the Google Ads interface is essential to the success of
Google Shopping Campaigns. However, equally important is the regular monitoring
of the Google Merchant Center Account.
For it is only within the
Google Merchant Center Account that advertisers can view issues related to
their product data that may prevent items from being eligible to display; learn
insights regarding other advertisers and configure account information such as
shipping, tax and contact information.
For these reasons, without constantly monitoring your Google Merchant Center Account it will not possible to fully optimize your Google Shopping listings.
Looking for More Information on Google Advertising?
If you have the dedication and are ready to take your online sales to the next level, then The Academy of Internet Marketing was created for you. It provides the tools in the form of knowledge of what works today. Join us and see what makes us special and together we will grow your business.
If you are ready to take your online advertising to the next level, I welcome you to take a trial. It only costs $1 for access.